

■ Features
From Underground to Iconic: An Interview with Framework’s Kobi Danan
› Read more
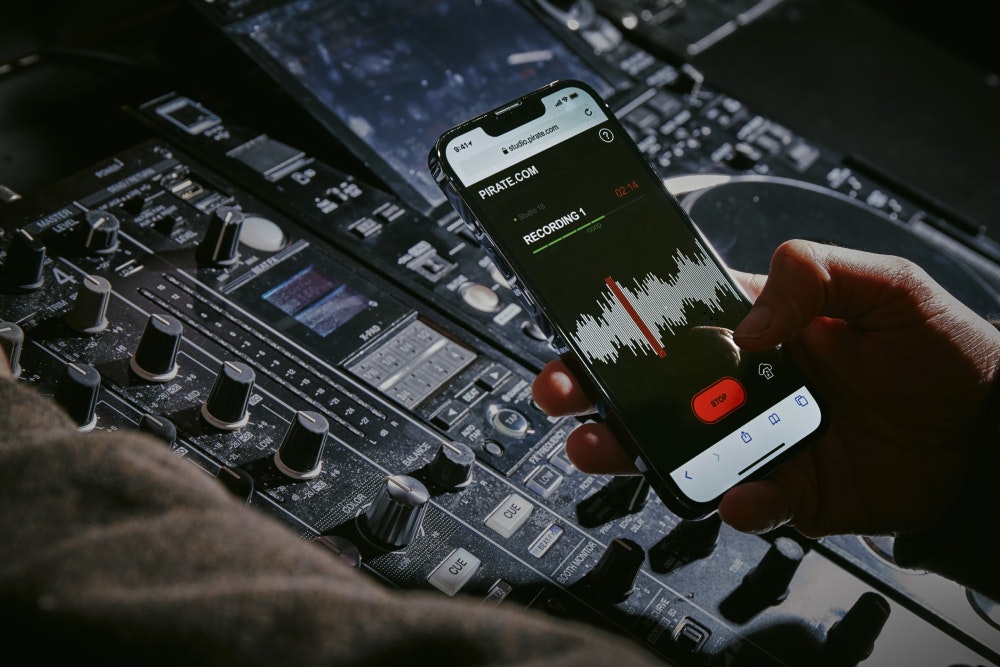
Your complete guide to the lightweight user-friendly DAW favoured by beginner producers – GarageBand.
Welcome to the world of music production! If you’re new here, you may not know much, but we’re going to teach you all you need to know to get started.
GarageBand is a capable and easy-to-use digital audio workstation (DAW) that can assist you in bringing your musical ideas to life, regardless of your level of experience.
In this article we'll guide you through how to write a song with GarageBand, from project setup through recording and editing tracks, adding effects and loops, and mixing and mastering your finished masterpiece. So, grab your headphones, fire up your Mac or iOS device, and let's get started exploring GarageBand together.
If you are new to music production, you may find yourself confused by a lot of the terminology. You'll find everything you need to know in our music production guide. The first acronym you're likely to come across is DAW. As we said before, it stands for “digital audio workstation.” A DAW is the program you will use to make your music.
There are many choices when it comes to deciding what program to use, but many of them are not so friendly for beginners. GarageBand, however, is very easy to use. Like most Apple products, it has an extremely user-friendly interface. That doesn’t mean it won’t have loads of tools, though. It offers a wide range of powerful features, including virtual instruments, audio recording and editing capabilities, MIDI support, pre-recorded loops, and effects, making it accessible to both beginners and experienced musicians alike.
GarageBand is used in more professional recording studios than you might expect. Some famous artists who have used GarageBand to make hits are Nine Inch Nails, Rihanna, T-Pain, and Radiohead.
With so many extremely successful artists using GarageBand, it’s no wonder it’s a popular choice of DAW for many up-and-coming musicians.
GarageBand is extremely easy to download and set up, particularly if you are already familiar with Apple devices. First, navigate to the App Store. Search “GarageBand” and click “Get” to download the app. Once pressed, your device should automatically install the program and put it in your “Applications” folder.
Unfortunately, GarageBand is not available on Windows. As it is an Apple product, it is likely that it will never be available for PC.
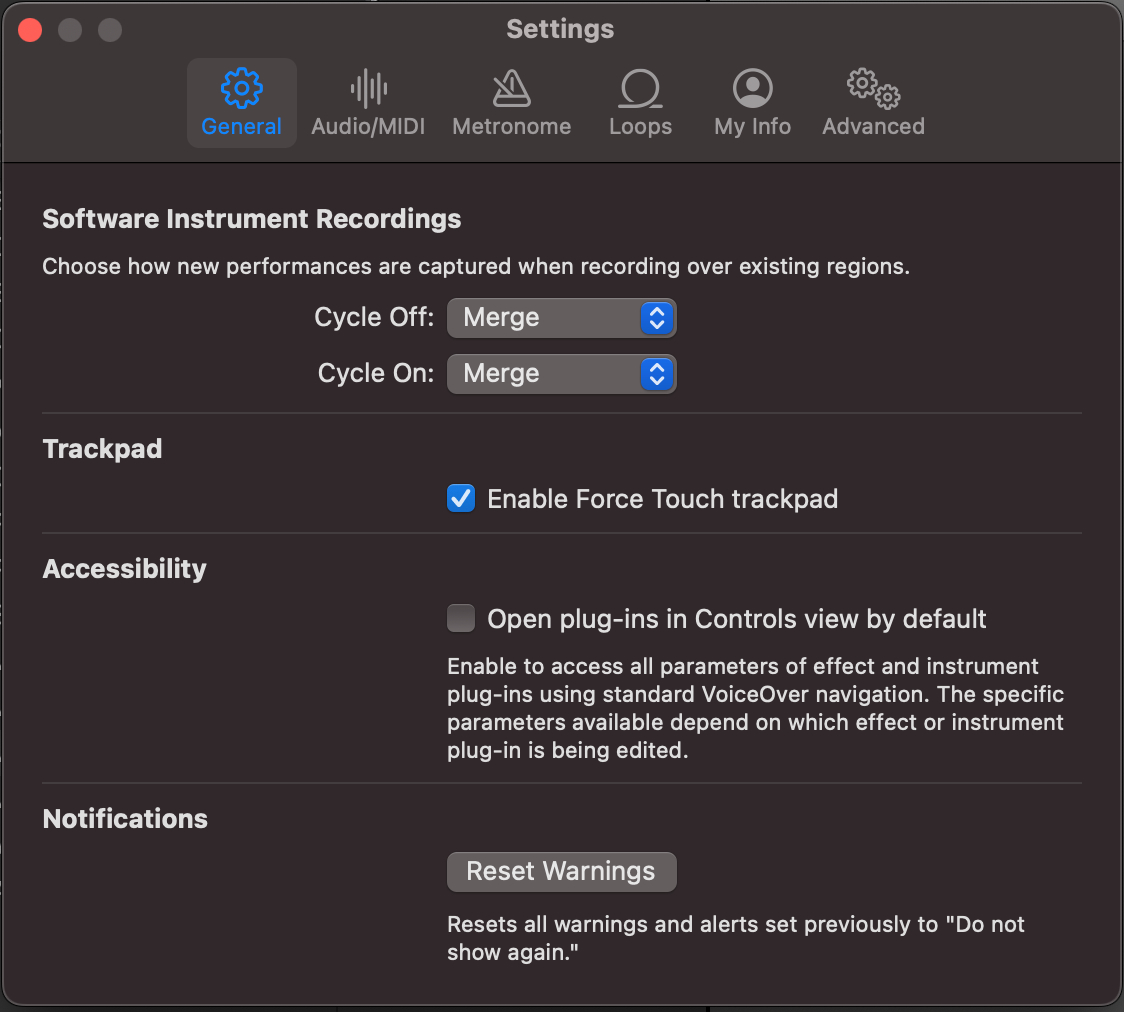 GarageBand Settings Menu
Setting up preferences in GarageBand is a crucial step to adjusting the program to your own personal workflow. You can alter a number of settings to change how GarageBand functions and behaves.
Choose "Settings" from the "GarageBand" menu in the top left corner of the screen on a Mac, or press "Command + Comma" on your keyboard to access settings.
You can change options for audio, MIDI, display, project settings, and more in the settings box. For instance, you can set up metronome options, playback settings, default project settings, and keyboard shortcuts. You can also arrange audio input and output devices.
 GarageBand Interface
The GarageBand interface is specifically designed to provide a user-friendly and intuitive environment for creating music:
Additionally, GarageBand offers a built-in tuner, metronome, and a variety of audio effects and processors to enhance your music.
When you begin a new project in GarageBand, you will be met with a window that will allow you to choose what kind of project you are working on.
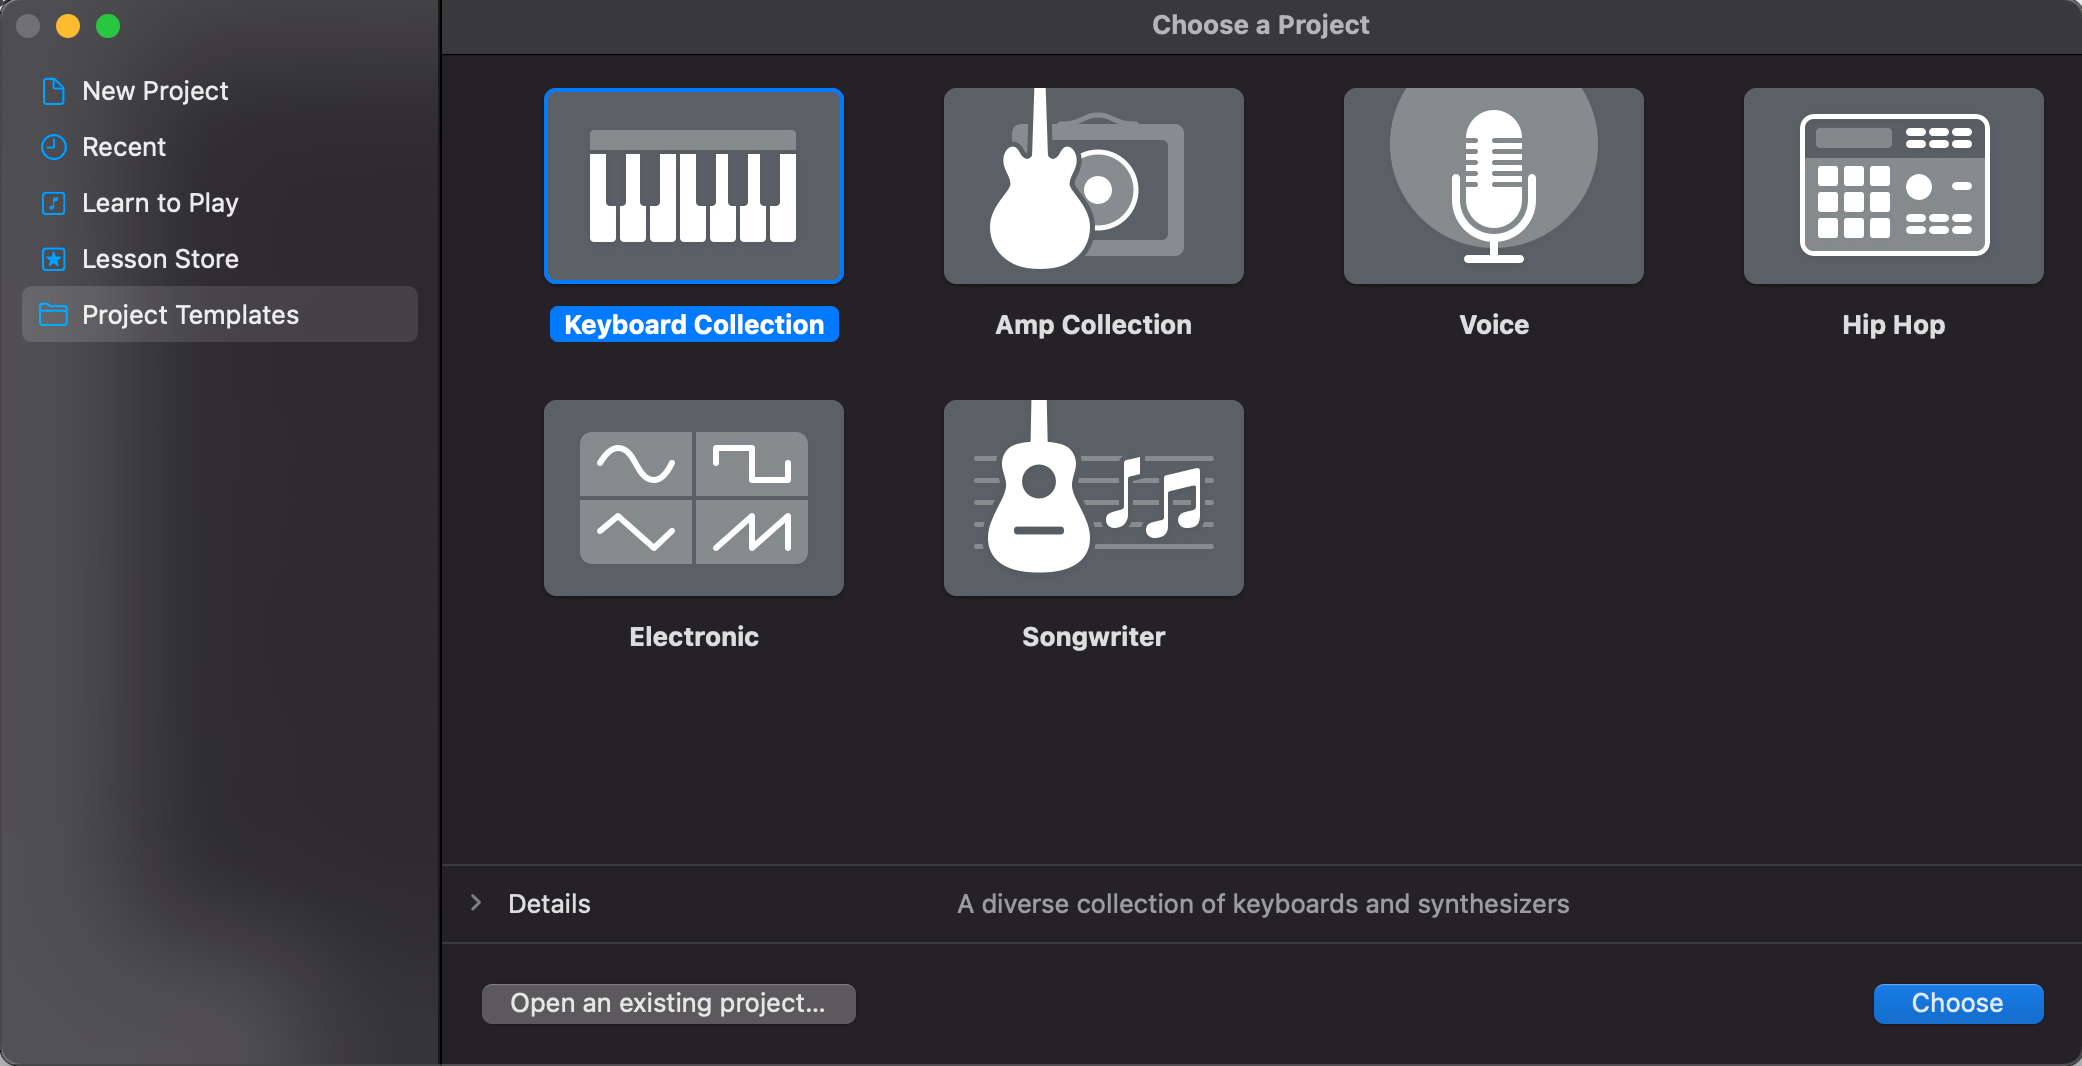 GarageBand Project Templates
There, you can decide what template will fit your project best. Based upon your choice, GarageBand will set up your session specifically to fit your needs.
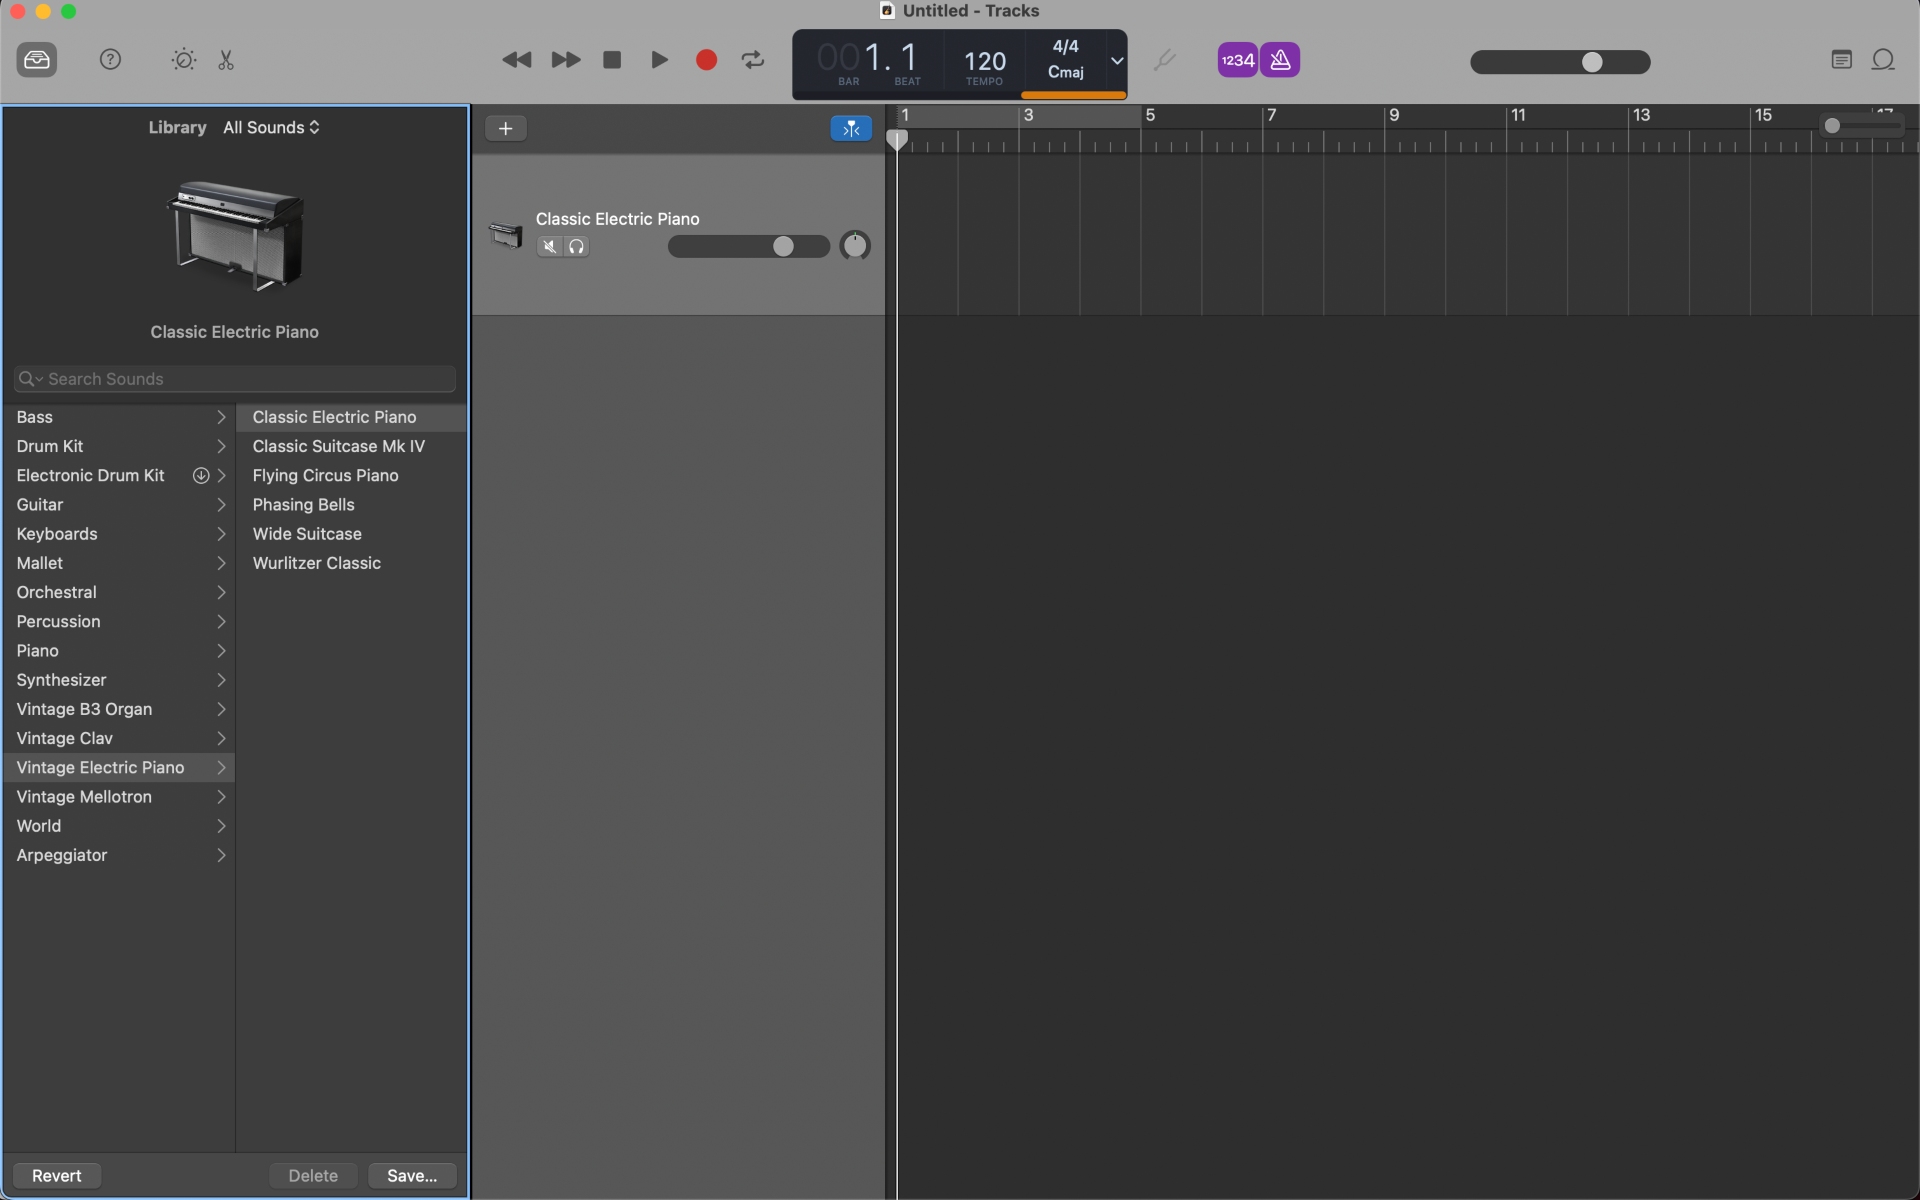
In order to choose the instrument you would like to use, you can access the instrument library. Once your project opens, the Library pane should already be open on the left. There, you can peruse the many instruments that come standard with the program. To access the Loops, simply click the loop icon on the top right of the interface. This will open the Loops pane, allowing you to choose the loop that best fits your needs.
If you already have tracks that you would like to import, you can do that by dragging and dropping them onto the track section of your project. The program can import a number of file types, but WAV files are recommended as the quality is better. In order to rearrange the tracks in your project, you can just click and hold the track and drag it to a new position.
To set up audio input in GarageBand, first connect your audio input device to your computer. This could be an audio interface or a USB microphone. Open GarageBand and go to the "GarageBand" menu on the top left, click on "Settings", and select your input device from the dropdown menu under "Audio/MIDI".
 Adding a new track in GarageBand
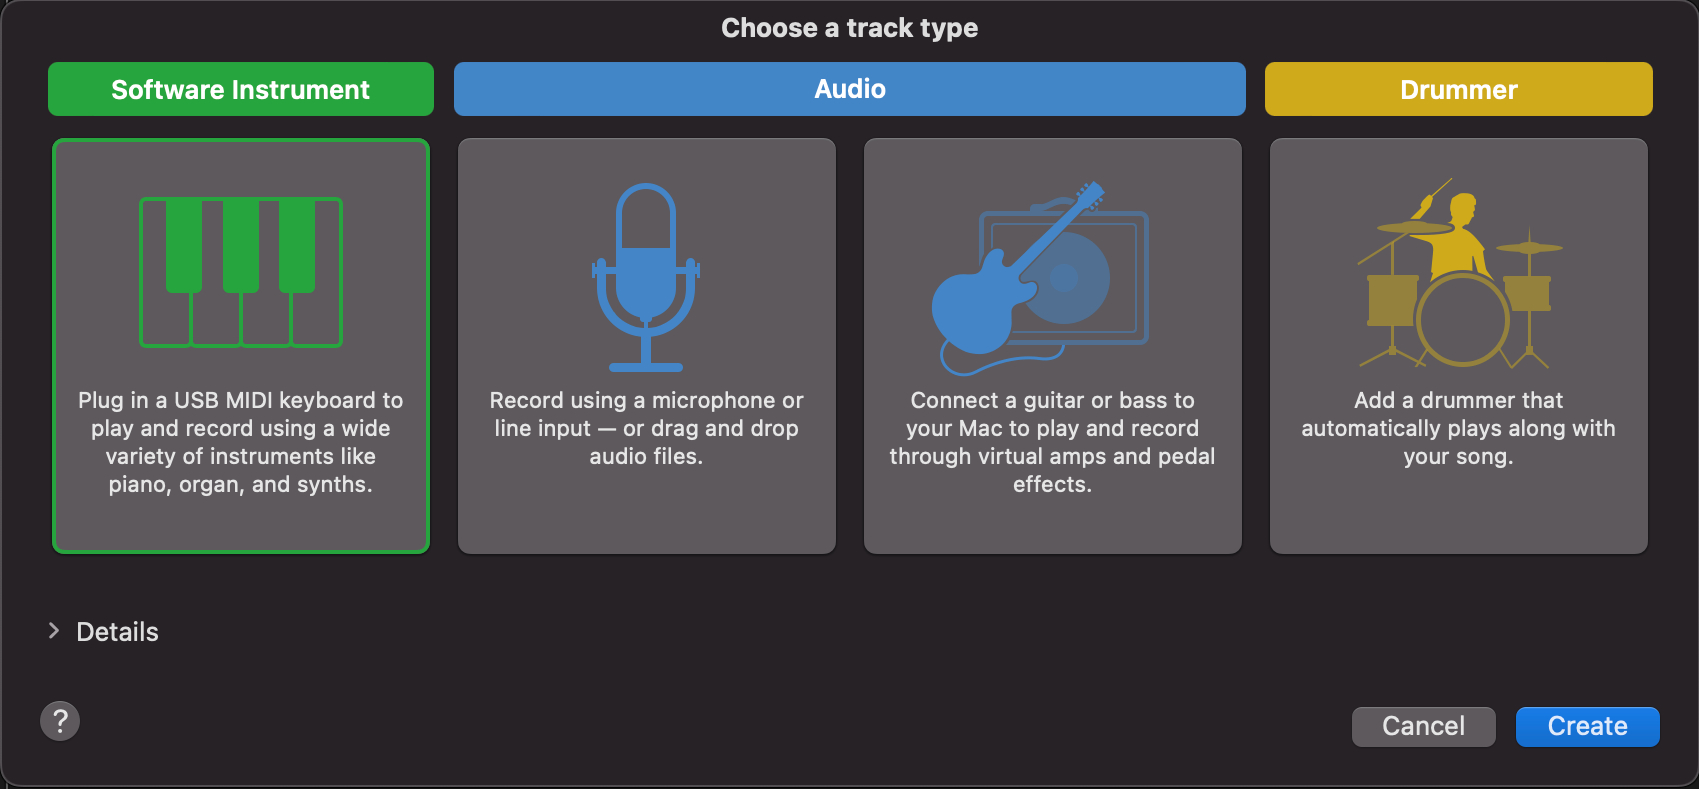
When you create a new track in your project, GarageBand will open a menu allowing you to choose what kind of track you want to make. You can choose between a software instrument track, audio recording, or the Drummer program.
Once you have set up your audio input and created an audio track, you’re ready to record!
Arm the track for recording by clicking on the record enable button on the track header. Finally, click on the red record button on the main bar to start recording audio.
Testing and adjusting input levels for optimal audio quality is important during recording. Make sure that your audio is not clipping – if you are seeing red on the meter, your input level is too high. You can adjust this with a knob on your audio interface.
The first step in using a MIDI device to record a track in GarageBand is to connect your MIDI controller to your computer. Then, create a new software instrument track in GarageBand. To start using the sounds, select a virtual instrument from the Library pane on the left and press a key or button on your MIDI controller. Click the red record button when you're prepared to record MIDI, then begin using your MIDI controller.
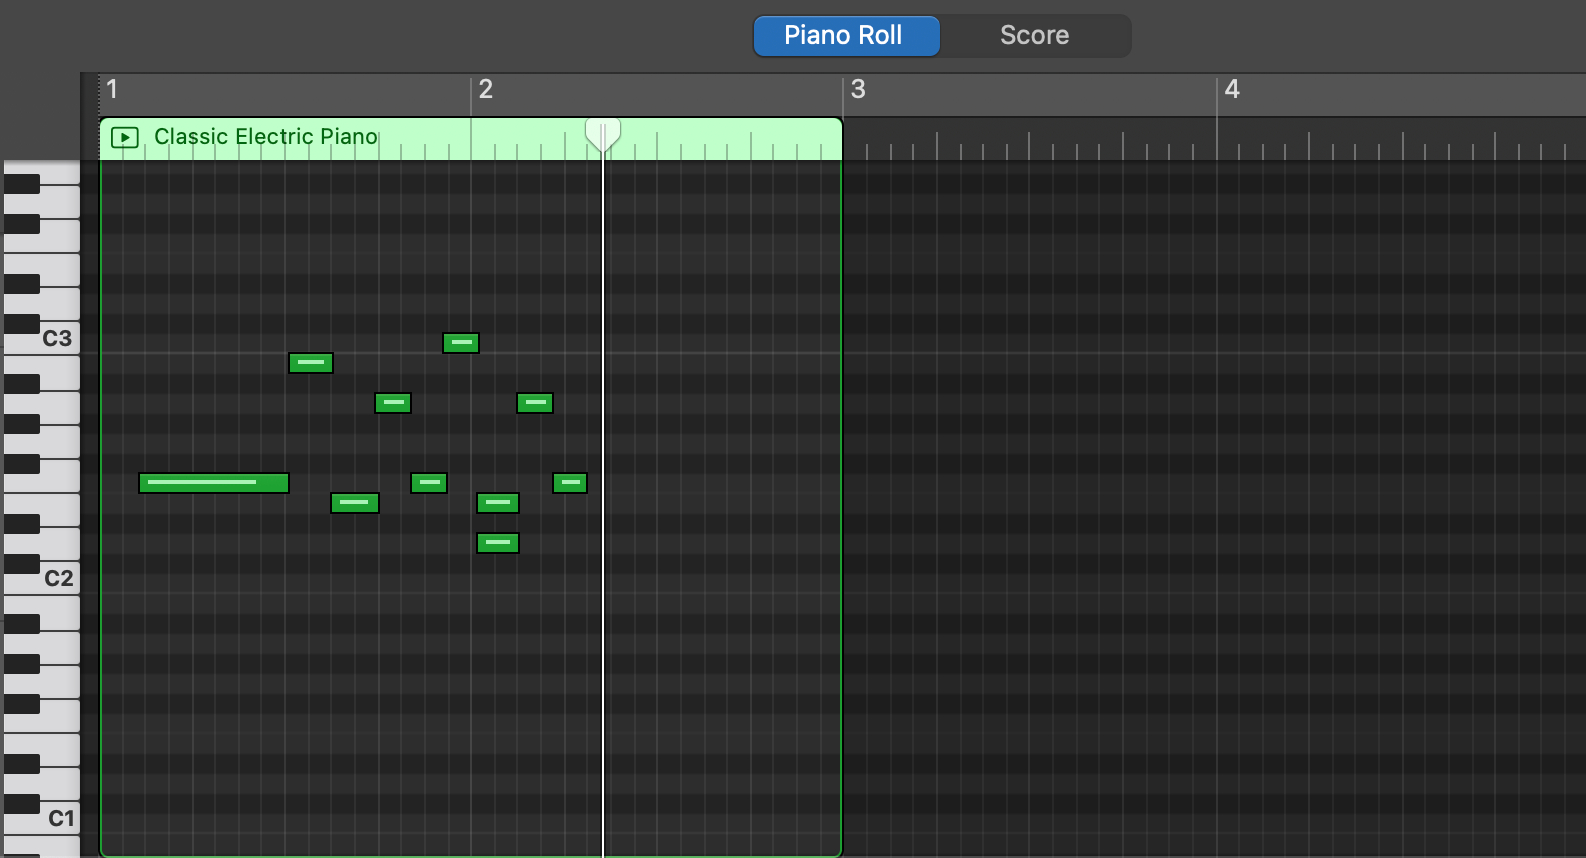
Your MIDI performance will be recorded by GarageBand in real-time. You can edit and alter the MIDI data using the MIDI editor to change note durations, velocities, and add or remove notes. MIDI notes can also be quantized to ensure proper timing.
With GarageBand's Loops tool, you can quickly and simply include previously recorded musical parts into your projects. Simply explore and choose loops from the Loops pane on the right. Once you’ve found a loop you like, simply drag and drop it onto your tracks section. In order to tailor loops to your tastes and specific project, you can change them by adjusting the length, pitch, and adding effects.
Recording vocals in GarageBand is a straightforward process. Start by configuring your audio input in GarageBand, making sure your audio interface or USB microphone is set up. Then, create a new audio track and select your microphone as the input source. To obtain ideal recording levels without clipping, adjust the input levels. To help with timing while recording, you can use the built-in metronome. It’s as simple as that!
Are you a guitarist or a bassist? You can record your performances straight to GarageBand. To use live instruments, connect your instrument to your computer using an audio interface. Create a new audio or software instrument track in GarageBand and set the input source to your instrument. Once again, adjust input levels to ensure optimal recording levels without clipping. Play your live instrument, and GarageBand will capture the sound in real-time. Afterward, you will be able to edit the audio captured from your performance to your liking.
If you’re looking for an affordable beatmaking software, GarageBand might be the answer.
Start by choosing a drum kit from the vast collection of virtual drum kits available in GarageBand. They will also be in the Library pane on the left. You can program the beats directly in the GarageBand interface or use a physical MIDI controller to play them in real time. There is also the option to sequence beats using the MIDI editor to build intricate drum patterns. If need be, you can quantize your live beat performance after the fact in the MIDI editor. The loop library can even be used to enhance your beats with additional percussion components.
Creating a song arrangement in GarageBand involves arranging your recorded tracks into a cohesive structure. Use the timeline view to visually arrange the sections of your song, such as intro, verse, chorus, bridge, and outro. Drag and drop the regions of your recorded tracks to rearrange them, and use GarageBand's editing tools to trim, loop, or duplicate sections as needed.
Use GarageBand's track volume sliders to adjust the levels of individual tracks so that they blend well together. Pay attention to the relative volume of different elements to create a balanced mix. Be mindful of avoiding clipping or distortion by keeping the levels within the recommended range – if you see meters in the red, they’re too loud.
 Plug-Ins In GarageBand
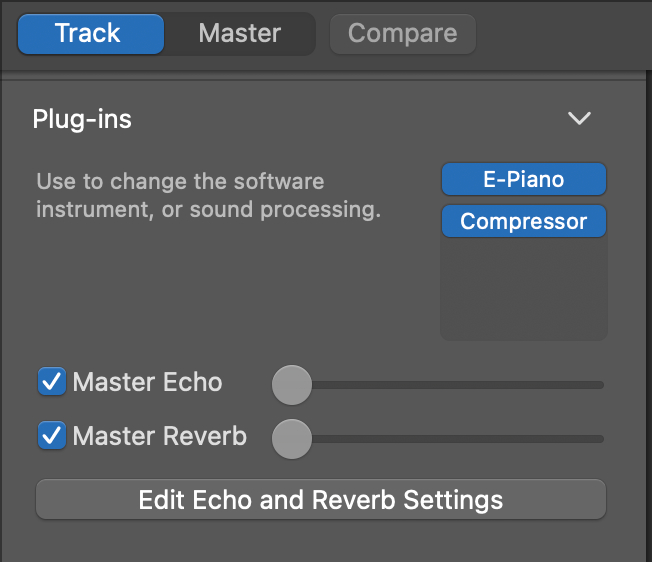
The EQ and compression tools are some of the most important in the mixing process. EQ allows you to adjust the frequency balance of individual tracks to enhance their tonal characteristics and create space for each element in the mix. Use GarageBand's EQ plugins to boost or cut frequencies, shape the sound, and remove unwanted resonances. Compression helps control the dynamic range of a track by reducing peaks and boosting quieter parts, resulting in a more balanced and polished mix.
Adding reverb and effects during the mixing process can greatly enhance the depth, space, and character of your mix. Use GarageBand's built-in reverb plugins to add natural or creative reverberation to individual tracks. Experiment with different types of reverbs, such as room, hall, plate, or spring, to achieve the desired ambience for your mix. Additionally, GarageBand offers a wide range of effects plugins, including delay, chorus, flanger, and more, that can be used to add texture, movement, and creative effects to your mix.
Once you have completed your mix, simply go to the File menu and select "Save As" to save your project with a specific name and location on your computer or external storage. You can also export your mix in various audio file formats, such as WAV, MP3, or AAC. To do this, simply go to the “Share” section of the top menu.
GarageBand makes it easy to collaborate with other artists. To collaborate, simply share your GarageBand project file or export your mix as a separate audio file and send it to your collaborator. They can then import the file into their own GarageBand project and contribute their parts, such as vocals, instruments, or effects. Once they’ve finished, they can repeat the steps to send it back to you.
If you aren’t satisfied with the stock plug-ins that are included with GarageBand, you can use third-party plug-ins. GarageBand supports Audio Unit (AU) plug-ins, which are industry-standard audio effects and virtual instruments developed by third-party companies. These plug-ins can be used to add new sounds, effects, and processing capabilities to your GarageBand projects. Simply install the third-party plug-ins on your computer, and GarageBand will automatically recognize and make them available in your audio effects and virtual instruments menus.
You aren’t limited to Apple’s stock loops, either. You can create your own! To create loops, simply record a short section of audio or MIDI that you want to use, such as a drum beat, guitar riff, or synth melody. Once you have recorded the loop, you can use GarageBand's editing tools to trim and adjust the timing and pitch as needed. You can also apply effects, such as EQ or compression, to further customize it. You can then save your custom loops in the Loops pane, making them easily accessible for future projects.
While GarageBand may not have the most powerful time and pitch editing capabilities, there are still plenty of tools at your disposal. For example, any MIDI information that is recorded can be edited and quantized, ensuring that your instrument is on beat. Additionally, you can use the Piano Roll feature to fix any notes you didn’t mean to play.
While GarageBand may be one of the most user-friendly DAWs out there, that doesn’t mean it is without its issues. Users may encounter common issues like performance problems and audio recording/playback issues. However, there are some pretty simple fixes.
For performance problems, closing unnecessary applications, updating software, and upgrading hardware can help. GarageBand can be taxing on your computer’s RAM, so it’s important to make sure that your computer isn’t already overloaded when you open it.
Audio recording/playback issues can be resolved by simply using low-latency audio interfaces (this is something to research when deciding which interface to purchase), updating audio drivers/firmware, and checking recording levels/gain settings.
GarageBand has several keyboard shortcuts that can make your life a lot easier and your workflow a lot faster. The three most important to remember are as follows:
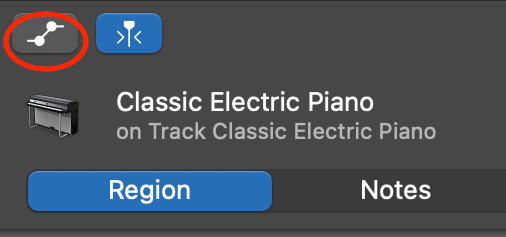
GarageBand's automation feature is a powerful tool that allows users to produce dynamic changes in their musical compositions. Users can utilize automation to gradually modify a number of settings, including volume, pan, effects, and more. They can automate volume changes to produce fades, modify pan to provide stereo movement, add filters or reverb to particular areas of their tracks, and more. The automation editor can be found by pressing the Automation button on the left of the Piano Roll.
In addition to using GarageBand on your desktop or laptop, you can also use it on your iPhone. The features are not as robust as the desktop version, but it’s great for when you have ideas on the go. Additionally, you can AirDrop your projects to your desktop to work on them in the full version of the app!
If you are at all familiar with Apple, Mac, or iOS, the program should be fairly easy for you to master.
Absolutely! The included sounds may be lacking, but there are plenty of third-party sound packs, samples, and instruments you can download and use in Garageband to supplement the standard sounds.
Yes! You can find this under the “Share” menu option.
In conclusion, GarageBand is an effective and user-friendly tool for making music on both desktop and mobile devices. It allows artists to easily record ideas, create tracks, and generate high-quality music thanks to its extensive feature set and virtual instruments. Whether you're a novice or a seasoned musician, GarageBand's intuitive interface, extensive sound library, and recording/editing capabilities make it a top choice for music production.