Logic Pro Tutorial: A Beginner’s Guide


Ridiculously powerful. Seriously creative.
So goes Apple’s slogan for their flagship music production software. Developed in the early noughties, building upon its precursor Emagic, Logic Pro has evolved into one of the most popular industry-grade digital audio workstations (DAW) available today. With its robust features and intuitive workflow, Logic Pro has gained popularity among professional producers, mixing engineers, and mastering specialists worldwide.
Whether you're a beginner taking your first steps towards setting up your home music production studio or an experienced musician aiming to enhance your technical prowess, getting to grips with Logic will be a game-changer, elevating your ability to compose, record, and refine music across any genre you explore.
In this article, we will delve into how Logic Pro stacks up against other options, provide an overview of its layout and functionality, and guide you through how to use logic pro for the process of recording, writing, editing, mixing, and mastering music on this comprehensive DAW.
What is logic pro used for?
Logic is an exceptional, versatile production suite for composers, producers, audio engineers, and podcasters alike - without a doubt one of the best DAWs for music production available. It offers a comprehensive set of tools for production, editing, recording, mixing, and mastering, allowing you to manipulate audio in any desired manner.
Whether you're sketching musical ideas, scoring a film in real-time, or refining podcast voice recordings, Logic equips you with the necessary tools to achieve your audio project goals. It even includes integrated Dolby Atmos tools for mixing and exporting songs as spatial (3D) audio.
As a professional DAW, Logic Pro provides multiple channels for working with various audio files in a timeline. You can manipulate and process these files using a wide array of effects and plugins, from a producer's bread and butter - compression, reverb, EQ - to many custom 3rd party offerings. Its sampling and MIDI sequencing techniques make it all you need to start writing electronic music.
Logic Pro and other alternatives
Logic comes with a price tag of £199.99 at the time of writing. Before committing to this investment, it's essential to explore other digital audio workstations (DAWs) that may better suit your needs. So here’s a quick breakdown of the pros and cons of using Logic compared to other popular alternatives. We also encourage you to take advantage of the generous free trial period before making your decision.
Garageband vs Logic Pro
-
Garageband is free. If you’re on a really tight budget and want to get started with some real basics of music production, you can download it off the app store and get going straight away.
-
Garageband is user-friendly. So this means it's great for beginners as it has a lower learning curve, but of course as a result lacks the advanced set of professional features, plugins and extensive sound library that comes with Logic. In fact, compared to any premium DAW, Garageband simply can’t offer the same level of control and customization options which allows users to fine-tune every aspect of their music production.
If you already know how to use Garageband, Logic Pro serves as a natural progression, offering advanced features and higher-quality music production capabilities. Although the learning curve may seem steep initially, transitioning from Garageband to Logic Pro unlocks a world of enhanced functionality and possibilities. Indeed, it's the upgrade many bedroom producers/songwriters I know made to go on and start making higher quality music.
FL vs Logic Pro
-
FL Studio is very electronic-focused. Formerly known as ‘fruity loops’, FL Studio is really well-equipped for pattern-based music production (clue is in the title!). If you’re focused on making dance music, this may be the one for you - its MIDI Sequencing and Piano Roll Editor features give such precise control over note arrangement, automation, and modulation. The drawback - given its interface is geared towards making music in such a way, it's far less flexible or suited for recording live music and vocals.
-
Logic is generally a preferred suite for mixing and mastering. A combination of the limited plug-in compatibility offered by FL Studio and the difference in interfaces, Logic’s workflow is much more suited to mixing and mastering, something that is assisted hugely by custom third-party plug-ins specific to these processes.
Ableton vs Logic Pro
-
Ableton’s live performance capabilities and unique workflow. Ableton’s session view is a unique feature to this DAW, making it the choice software among live performers, allowing them to arrange and trigger clips, loops, and effects in real-time. This non-linear workflow allows for more spontaneous composition, experimentation, and sound design. Logic is still normally favoured for the mixing and mastering process.
-
Ableton’s Advanced Warping and Time Stretching. Another feature Ableton users laud over Logic users is its audio-clip manipulation and warping capabilities, which maintain high audio quality all the while. While Logic has this feature too, it's more fiddly.
-
Ableton is not exclusive to Mac in the same way Logic Pro is.
Protools vs Logic Pro
-
Protools if often regarded the industry-standard choice for audio post-production. Particularly if you want to go into audio for film, it would be good to gain working knowledge of Pro-tools. Though it's less often used for composition.
-
Protools’ seamless integration with hardware. Whilst Logic’s hardware integration is good, given Protools’ reputation as the professional audio recording, editing, and mixing for music software, it is unsurprising they have chosen to make it really compatible with studio setups.
Audacity vs Logic Pro
This is a similar comparison to the Garageband vs Logic comparison. Audacity is free and easy to use but won’t really offer any detailed editing, effects, composition, mixing or mastering capabilities though.
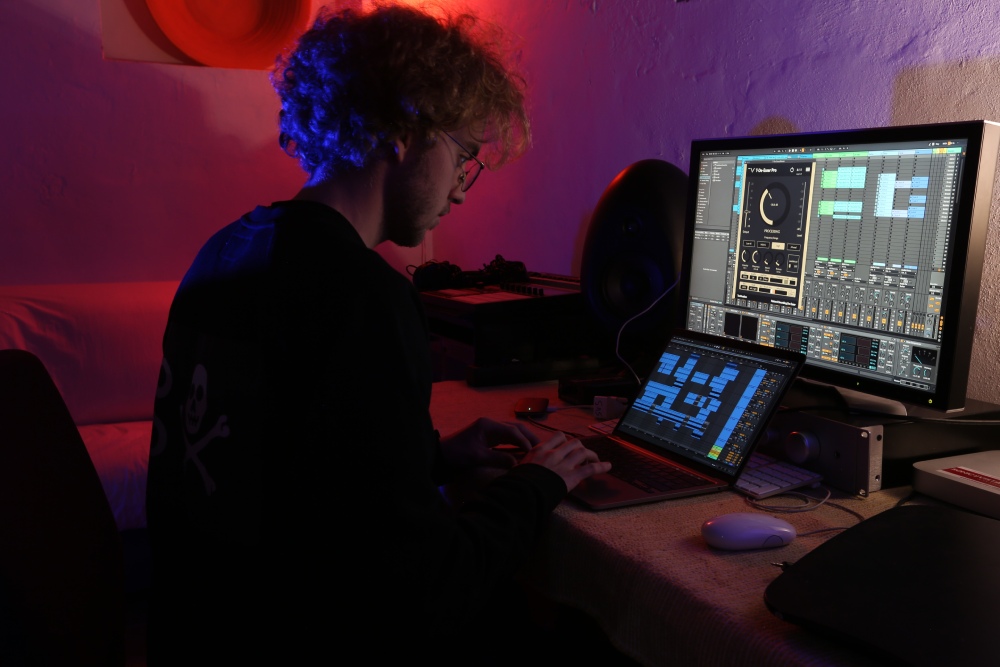
How to use Logic Pro
Getting Started
Before jumping into actually using the software, it's essential to ensure that your system meets the necessary requirements and that you have compatible tools and equipment. As mentioned previously, Logic Pro is exclusively available for macOS, so chances are, if you have a relatively new Apple computer you should be able to run it.
System Requirements
The minimum requirements listed on Apple's website today are:
• macOS 12.3 or later
• 6GB of available storage space for minimum installation or 72GB of storage space for full Sound Library installation
Given it's a bit of a workhorse, you’ll want to make sure you have sufficient RAM to prevent your computer struggling to process all that high-quality audio. 16GB would be ideal, but 8 should suffice.
Can you install Logic Pro on Windows?
Technically not. Though running a dual-boot system will allow you to run iOS on a windows computer - something known as the hackintosh method! You can look into this further if you like.
Download and install
Once you’re confident you’ll be able to run Logic on your system, head to the App store to download the software and follow the installation instructions.
Free vs paid version
There are absolutely no restrictions in the functionality of Logic’s free trial, apart from its 90-day limit. So definitely try this out before committing to paying for the license.
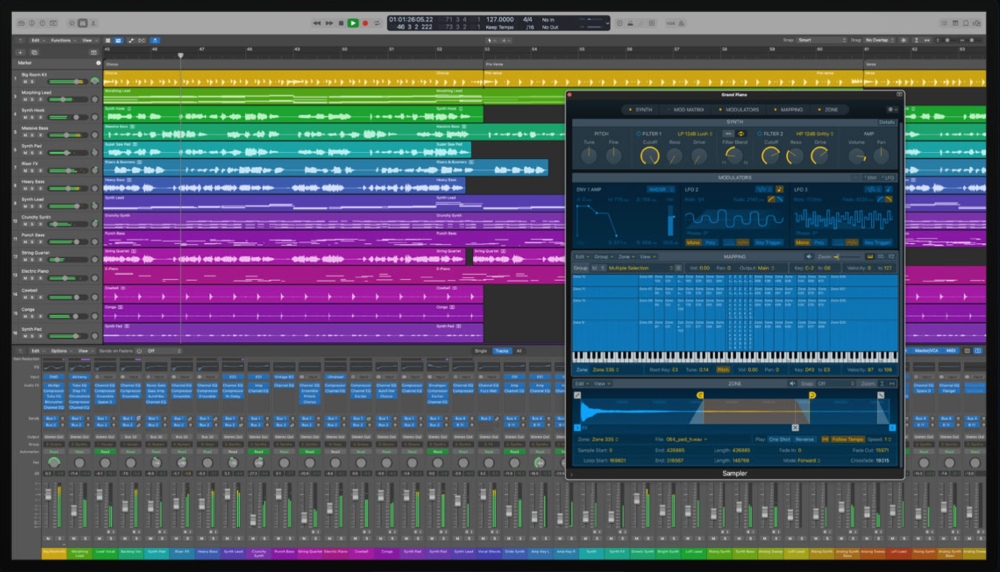
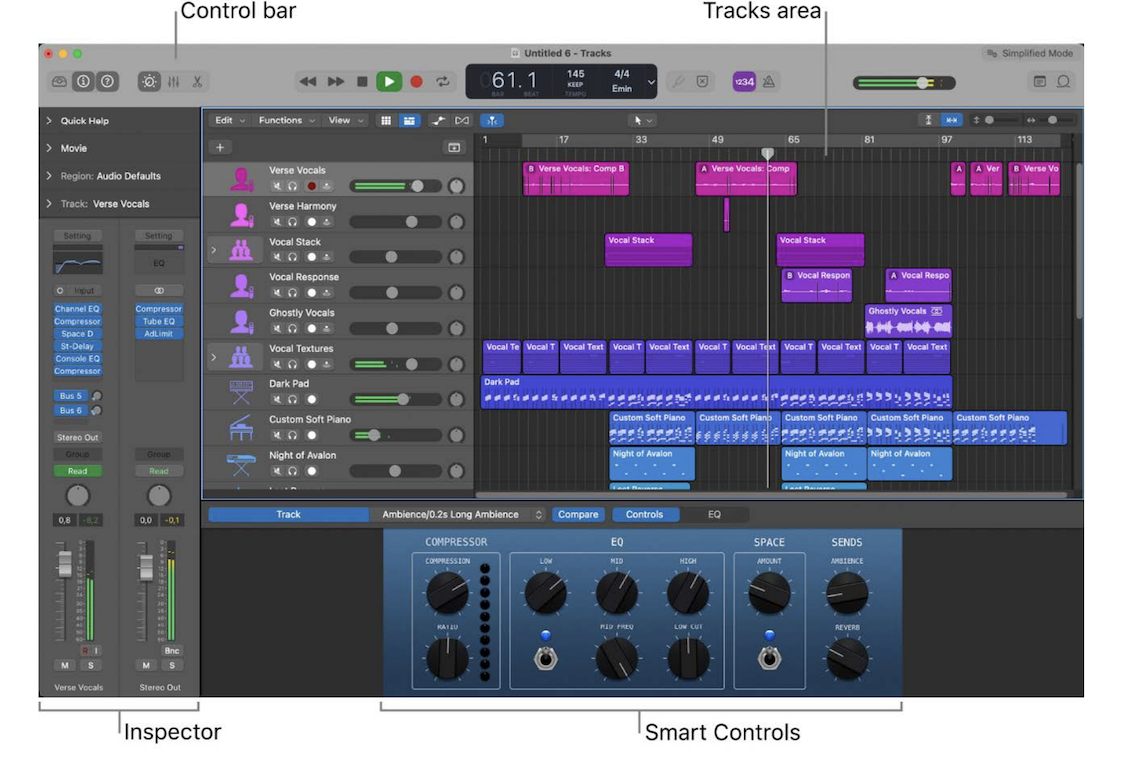
User Interface and Navigation
Logic has a fairly intuitive user interface, but may be daunting at first given the number of various windows, menus, and toolbars on offer. Familiarize yourself with the workspace, including the Inspector, Library, Mixer, and various other panels, so you can efficiently navigate and access different functions while working on your projects.
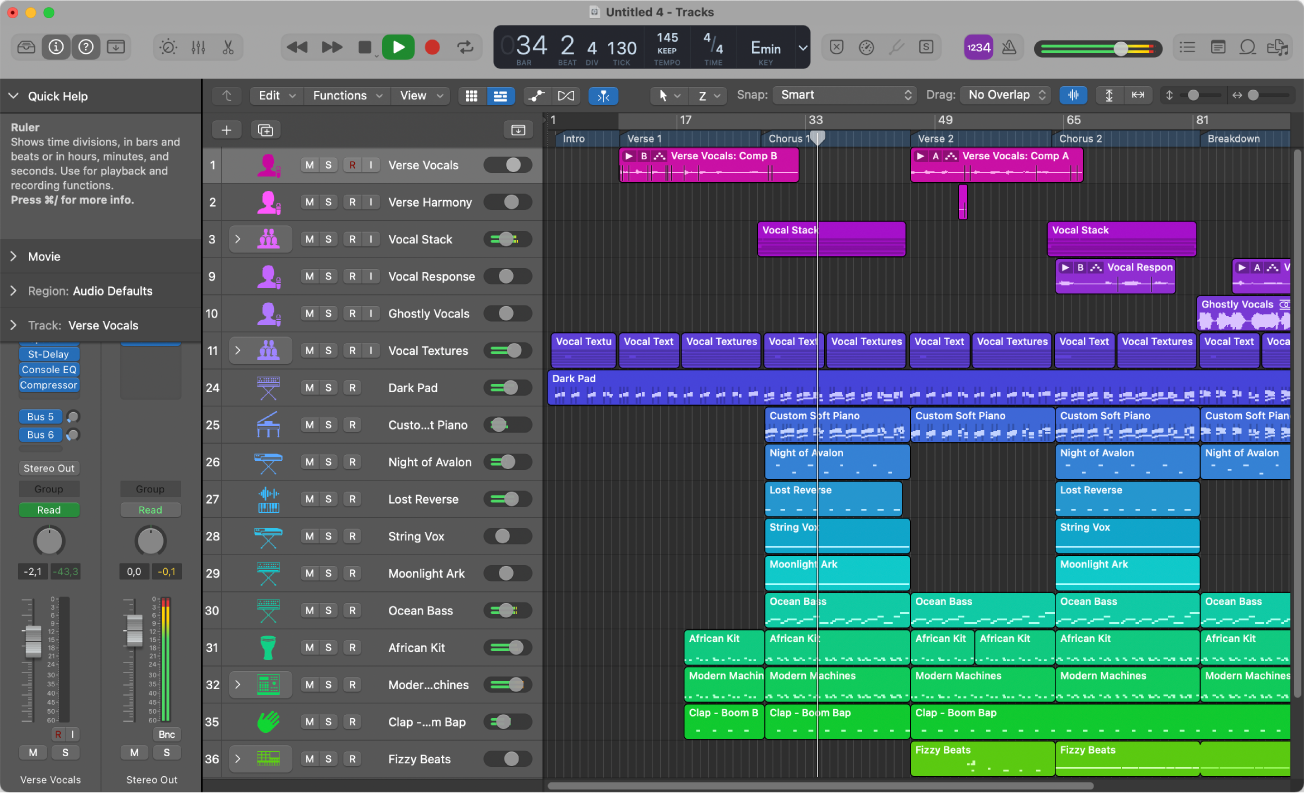
How to navigate the ‘Arrange Window’
The Arrange Window - a timeline of audio and MIDI regions - serves as your primary workspace, so it's important to be comfortable navigating around here. You’ll need to need to zoom in and out, expand or collapse tracks, access automation channels and more. Familiarising yourself with key commands and shortcuts to streamline your workflow is the easiest way you’ll be able to navigate effectively, such as using the Magnifying Tool with Option key (⌥) + Click & Drag to zoom in - we’ll go through a number more of these later on.
Setting up a Project
Working with tracks
Tracks serve as containers for your audio, MIDI, and instrument recordings. To add tracks, go to the Track menu and select Create Track or use the shortcut ⌘+⌥+N. Each track appears on both the timeline and the mixer and can be customized with settings like instrument selection, input source, and output routing, which we'll explore in more detail later.
You can choose from various track types such as audio, software instrument, or external MIDI. The most basic is an audio track, which you can drag and drop files into. Software instruments are used for plug-in instruments, while MIDI will allow you to control instruments using notes you programme in.
Recording voice or musical instruments
Recording into Logic will require doing so via an audio interface (which you should already have if running a DAW). You’ll need to select as the input device in settings and set the track you are recording into. This configuration allows you to capture audio signals from instruments such as external synthesizers or vocals from a microphone.
To initiate a recording, you can either click the record button located at the top bar or simply press the 'R' key on your keyboard. It's important to consider the buffer size setting, which determines the amount of audio data processed at a time. Select the lowest buffer size possible without experiencing audio pops to minimize latency issues during recording.
You may need to perform multiple takes to achieve the desired performance. Logic Pro provides tools for monitoring, punch recording, and editing to refine your audio.
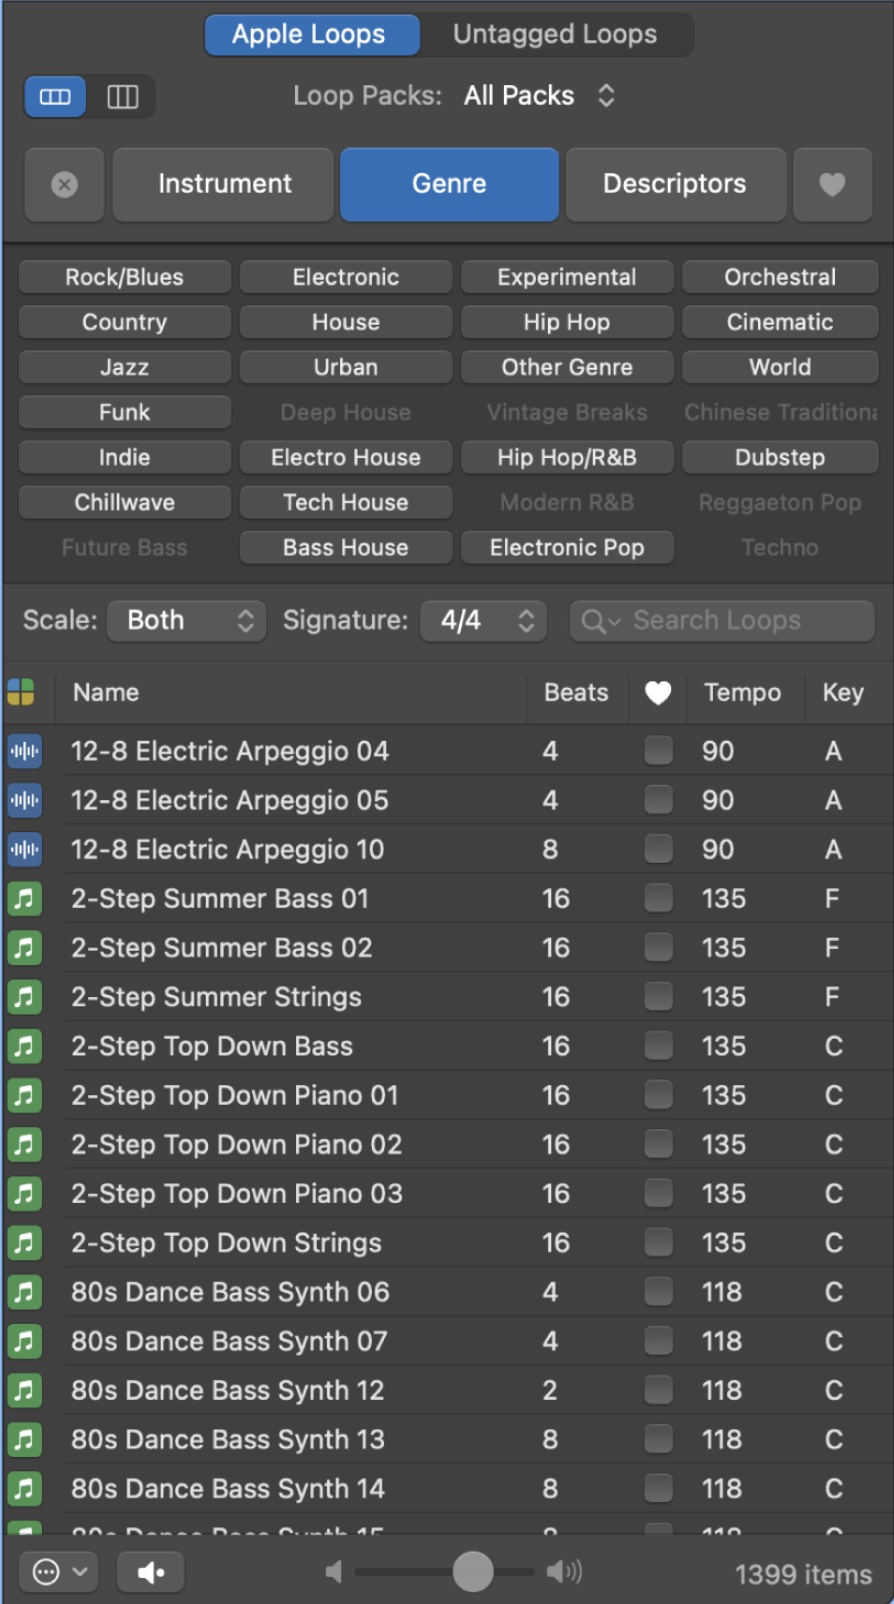
Using loops and other media files
Logic offers a vast collection of loops and other media files that are royalty-free samples and can be dropped into your project straight away. Loop Browser, located in the Library, allows you to browse through various categories and genres.
You can preview loops, then drag and drop the desired ones onto your tracks. You can of course also import your own media files, such as audio samples or MIDI files/templates. Hit Import from the File menu or simply drag-and-drop into an empty track. From there, you can manipulate, edit, and arrange these files to your heart’s desire.
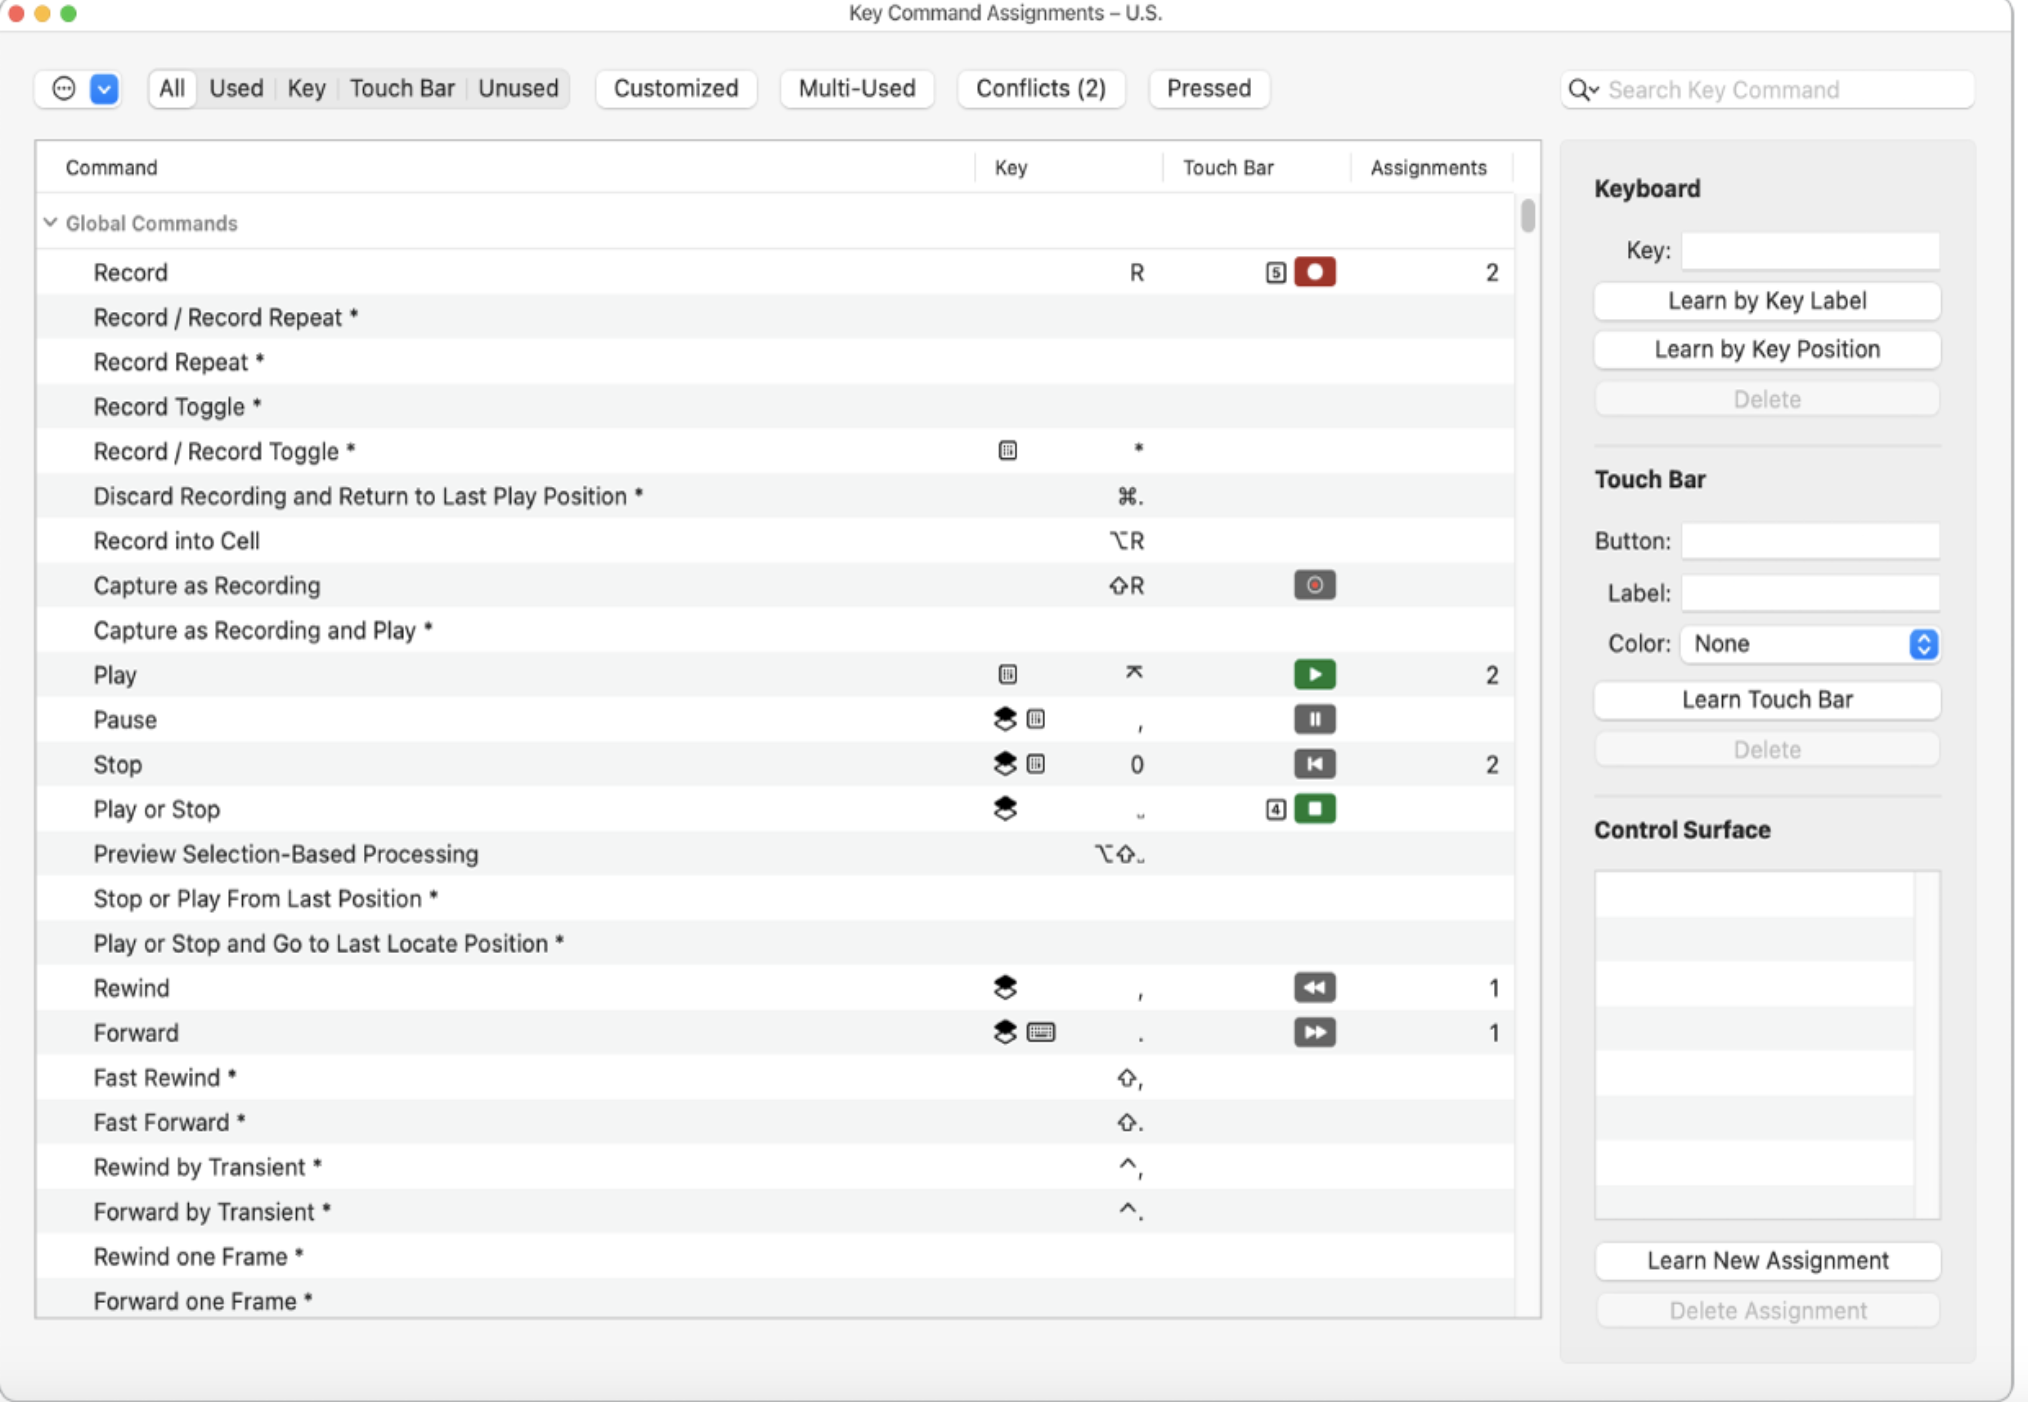
Key commands and shortcuts
As mentioned, getting familiar with shortcuts is going to greatly enhance your efficiency and productivity, ensuring your workflow is as smooth as possible and reducing the laborious cognitive load that comes with navigating menus and doing lots by mouse. Once you get them down, they’ll feel like second nature. Be aware that some keys’ actions are specific to what is selected - for example ‘M’ for mute will work on the specific track selected.
Logic Pro Shortcut Cheat Sheet - from hyperbits.com
Global Commands
• Logic Key Commands: ⌥+K (this allows you to customize your shortcuts)
• Record: R
• Toggle Click Track: K
• Play/Stop: Space
• Trim at Playhead: ⌘+T
• Hide Track: H
• Open/Close Mixer Window: X
• Open/Close Piano Roll: P
• Open/Close Audio File Editor: F
• Mute: M
• Mute Specific Region: ⌃+M
• Solo: S
• Cycle Mode: C
• Bounce Session: ⌘+B
• Main Window
• Set Locators By Region or Marker: ⌘+U
• Delete Track: ⌘+⌫
• Automation View: A
• Global Track Lanes: G and ⌥+G
• Zoom with the Magnifying Tool: ⌥+ Click & Drag
• Copy & Paste: ⌥+Click & Drag
Tracks
• Create New Tracks: ⌘+⌥+N
• New Audio Track: ⌘+⌥+A
• New Software Instrument Track: ⌘+⌥+S
• New External Midi Track: ⌘+⌥+X
• Create Track with Duplicate Settings: ⌘+D
• Create a Track Stack: ⌘+⇧+D
Logic Pro features you should use
What you ‘should’ use is of course very much down to what kind of music you make and the workflow you develop. Here are a few we defo recommend checking out though.
Flex Time and Flex Pitch
Flex Time allows you to manipulate audio tracks by adjusting their timing, creating time-stretching effects, and aligning them to a specific grid using Flex Markers, all while maintaining the same pitch and natural sound. Flex Pitch on the other hand enables you to adjust the pitch of individual notes, allowing you to perfecting vocal performances or harmonies.
To activate this hit the small infinity-looking symbol above the timeline, which allows you to select options like Flex Pitch or Flex Time - monophonic/slicing/rhythmic etc - from a dropdown menu on the track. Together these are really powerful not just corrective tools, but creative ones too.
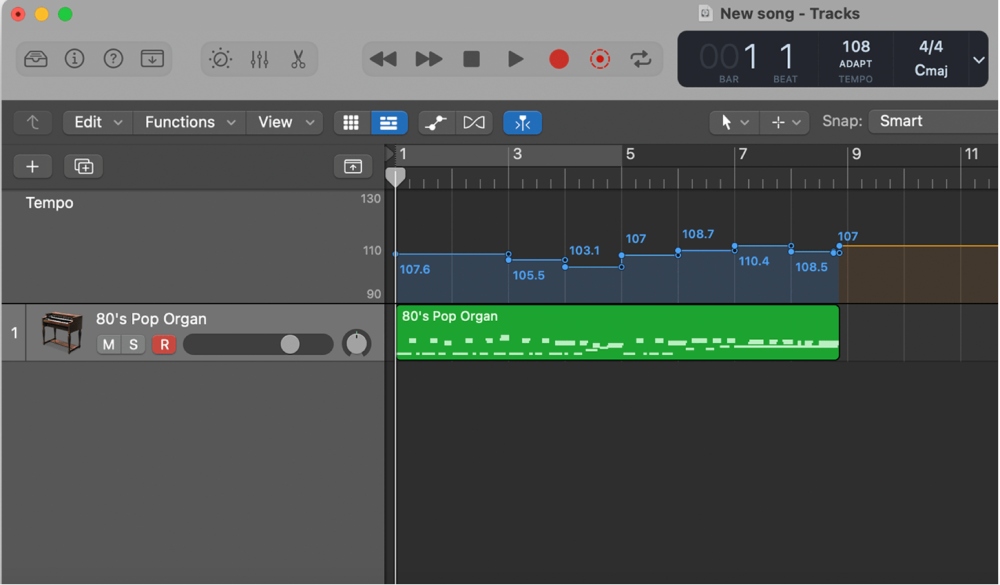
Smart Tempo
Record without a metronome, have Smart Tempo analyze the recording and automatically create a tempo map, then use hints to refine the analysis and add time signature changes. - Apple
Somewhat related to the above, Smart Tempo automatically analyzes and detects the tempo of imported audio, allowing you to easily align other tracks or perform tempo adjustments without artifacts while recording. Smart Tempo simplifies the process of integrating audio recordings and ensures your project stays in perfect sync.
Drummer
This is another standout feature: virtual drum performances that are customizable and realistic. It’s essentially like having a bandmate there laying down beats for you, there’s Kyle - the pop rock drummer, Max, a punk or whatever drummer to suit your style. simply drag in a drum groove sample and set the virtual drummer to follow the drum groove track. The virtual drummer will generate a similar yet unique pattern in the chosen style. Freaky, right?
This pretty instantly gives you a feel for how a drum track would complement your musical ideas, whether they involve guitar riffs, piano chords, or more. You can even adjust the complexity, intensity, and feel of the performance, but of course it’s not quite as nuanced as having a real drummer on board.
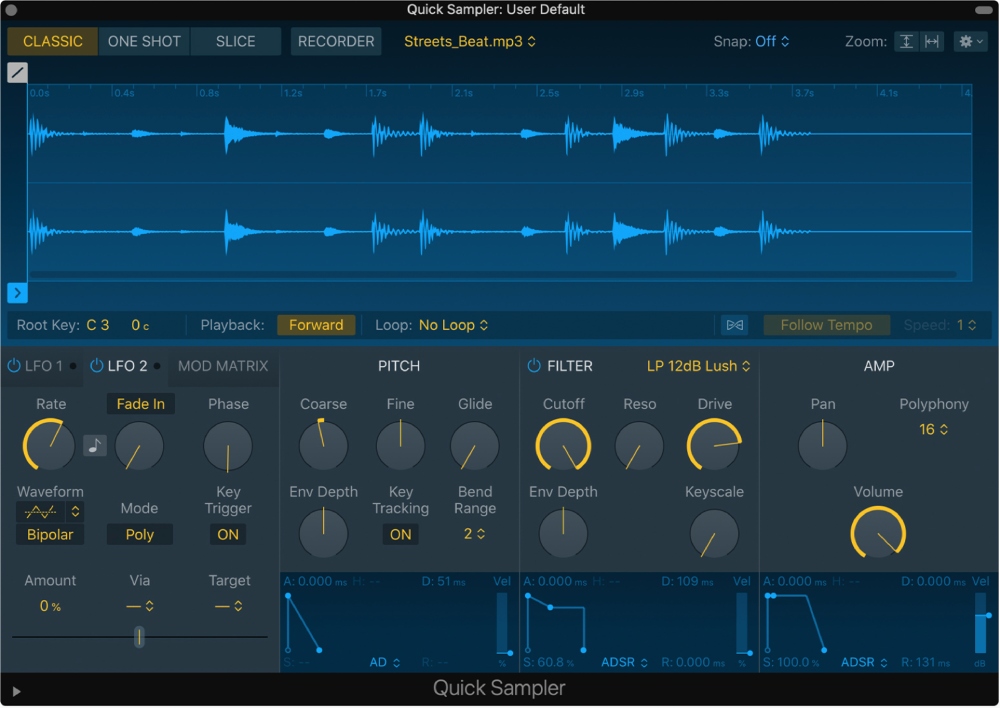
Quick Sampler
Somewhat resembling Ableton’s Simpler, this is an amazing and intuitive way to make beats on the fly. You can quickly load and manipulate audio samples to create unique sounds and programme rhythms. Controls include start and end points, loop settings, pitch, and you can automate envelope shaping, filtering, and modulation either manually or ‘played-in’ with an outboard controller.
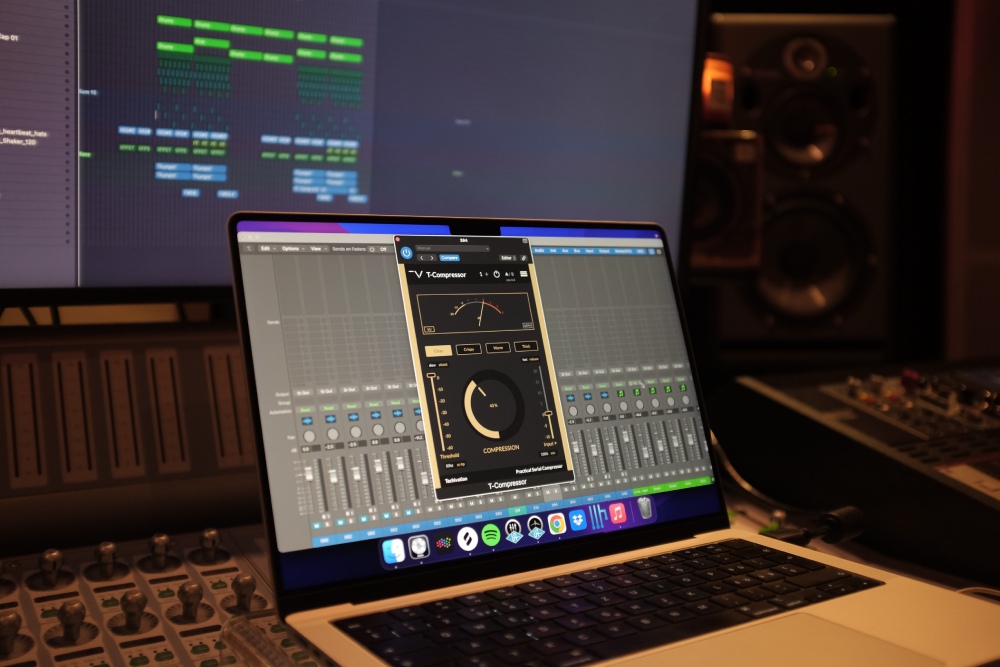
Logic Pro Plugins
Logic’s own set of plug-ins is, quite frankly, ridiculous. From vintage keyboards and retro synths to extensive amps, arpeggiators, FX and mixing tools you can apply to any channel, you have all the creative tools you need to work your magic. Here are just a few you might want to explore.
Alchemy
This is a hugely powerful and varied synth. Whether it's adding subtle textures or huge riffs, Alchemy has you covered. With its extensive library of presets over 3000 sounds, modulation options, advanced filters, and deep editing capabilities, you can quickly hone in on what you’re looking for with its keyword browser and start experimenting.

Space Designer and Chromaverb
Space Designer is an amazing reverb tool, which processes reflections and convolutions in real-time based on the input. It has a great user interface with EQ, volume and density controls, allowing you to bend the sound design and mixes to your will. Whether you’re trying to create a cool effect on one single sound, or applying organic-feeling reverb to make a set of drums sound as if it were in a real room or hall, this is your go-to.
Chromaverb on the other hand has more of an otherworldly feel to it. Choose from 14 discrete room-type algorithms and apply this one for some unique tonal color and room absorption characteristics.
Channel EQ and Vintage EQ Collection
This is one of a producer’s most important tools - it allows you to shape individual sounds and mix tracks, so it's crucial to know how to use EQ. You’ll probably find yourself using the channel EQ a lot, which has a great visual interface and gives you a lot of control over the precise frequencies you want to push back and draw out in the mix. Their vintage collection emulate some classic analogue outboard EQs too -
• Vintage Console EQ - based on Neve 1073 channel strip - use on bass, drum busses, vocals & melody - warm, adds a lot of colour.
• Vintage Tube - based on Pulse Techniques “PulTec” EQP-1A & MEQ-5 units - use for mixing and mastering - beefs out low end and smooths mids & highs.
• Vintage Graphic EQ - based on API 560 Graphic EQ - use for drums, guitars, vocals - precise frequency manipulation and tight imaging.
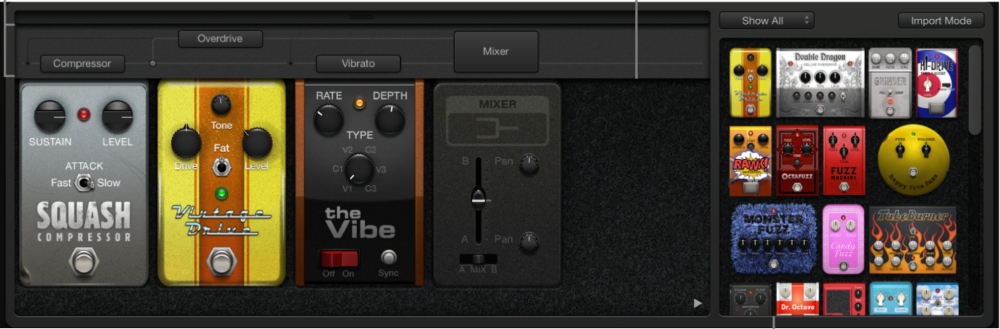
External/ Third-Party Plug-ins
But Logic is by no means limited to its own plug-ins. You can install pretty much any custom VST, ones you may have read on some blogs as being essential to your favourite producer’s signature sound. There are even number of free plugins for logic pro and we definitely recommend checking out the ranges from:
• Native Instruments
• Waves
• FabFilter
• Soundtoys
• Izotope
Working with effects
Effects are a great way to add some spice to your tracks and add depth and character. You can either apply these directly on each channel and adjust the dry/wetness to suit your preference, via a send channel and have the plugins set to max ‘wetness’, controlling the effect strength by adjusting the volume of the send track.
Delays are probably the most commonly used effect, as they can create some really trippy sounds and immediately add space and depth - some of the catchiest songs out there (particularly in dance music) are indebted to a well-applied delay. Logic offers a bunch of these:
• Delay Designer (multitap delay)
• Echo (really simple)
• Stereo (great for mixing)
• Tape (vintage, gritty).
They all have quite different characters, so get to know them and apply them differently.
Modulators are another one you should explore. Definitely check out their Ringshifter, which combines ring modulation (adds metallic/clangorous sounds) and frequency shifting (alters the harmonics of the original frequencies). Results range from lushness to creepy robot sounds.
Remember, there are no rules. You could run drums through a guitar amp for example! Though your ideas may not always come off. Mixing tools such as compression, reverb and EQ can also be used to create effects. For this reason, it's good to distinguish your mixdown process, where you’ll be applying these technically, to your creative process, where you can use these in fun ways.
Be careful not to overuse FX, as they can quickly muddy your mix and lose focus on the original elements. Instead, use them intentionally to enhance your work. Over time, you’ll develop a number of signal chains that you really like the sound of, so be sure to template these so you can quickly use them again.
Recording audio in Logic Pro
If you’re looking to capture live vocals and instruments, Logic has everything you need to achieve professional recordings. The quality of the recording will mostly be down to the grade of the hardware/microphones you’re using, as well as the sound treatment of your room - so there’s an extra layer of cost if you’re looking to get something really clean.
Once you’ve plugged in your instrument or microphone into your audio interface, you’ll need to configure the interface as the input device and arm a track as the input for it. You can check the signal level to see that information is coming in. Once it looks like you do, hit record and off you go with your first take.
If you’re recording vocals, you’ll also likely want to route these out of the headphones while recording is going on, which you can do by enabling the click the Input Monitoring button to the right of the recording button. Be careful with gain staging and ensure you aren’t clipping, as this will result in a distorted recording.
Editing audio in Logic Pro
The primary goals of editing audio are to:
• Clean out any unwanted noise
• Identify which takes to use and any re-recording required
• Form an optimal arrangement
Doing this in Logic couldn't be easier. Their audio track editor allows you to move and trim audio, displaying a close-up view of the audio waveform of the regions on the track in a time grid. Further manipulation such as quantization, re-pitching, reverse and inversion, editing transients and more are all at your disposal. These are ‘non-destructive’, meaning you can return to your original recording whenever you want.
Recording MIDI
If you write electronic music, using MIDI to write melodies, chords and basslines is an incredible songwriting tool. MIDI essentially allows you to programme in the notes and rhythms, then have your computer trigger an instrument (either software instruments or outboard hardware) with what you’ve written.
Certain in-built plug-ins will allow you to write MIDI such as the piano roll, and you can connect an external MIDI device such as a controller or synthesizer, setting this up in the Audio MIDI Setup (AMS) utility. From there you can route out MIDI patterns to trigger your external instrument.
Mixing & Mastering a track in Logic Pro
Logic Pro is a widely favoured DAW for mixing and mastering given its intuitive interface for these processes. Both are crucial stages in the music production process, where you refine and polish your tracks to achieve a professional, cohesive sound.
Mixing
• Aims to balance and blend the individual elements of your track to create a harmonious and well-defined mix.
• In Logic Pro's Mixer, you can adjust the volume levels, pan positions, and apply various effects to each track. Key processing to apply include EQ, compression, reverb, and automation to shape the balance, dynamics, and spatial depth of your mix.
• Logic allows for professional techniques such as send/return tracks for parallel processing and bussing to group tracks together for cohesive treatment.
• Pay attention to stereo imaging, frequency balance, and overall clarity to ensure that each element sits well within the mix.
Mastering
• The final stage where you optimize the overall sound, applying processing to the whole track to enhance its character and prepare it for distribution.
• Logic contains many pro-grade tools such as multi-band compression, EQ, stereo widening, and limiting to help you get a balanced and commercial master.
• Mastering is an art and often left to the professionals. Though if you're keen to try it yourself, follow out seven-step guide.
Finalizing and exporting your project
Exporting your project can be confusing, as there are many different settings you can apply. Always ensure the project settings are optimized for its purpose and audio files are exported in the desired format. A few things to check include -
-
Make sure you set the desired length of the export correctly. Logic allows you to bounce certain sections of a project file, so be sure you have the right portion selected, or that it is bouncing the whole thing if that’s what you’re after.
-
Your sample rate, bit depth, and project tempo match your desired output specifications. For exporting premasters, you’ll want to make sure it's set to: 44.1/48kHz, 24 bit, no dither. With exporting a master file, you’ll want to apply a dither. Always export to WAV or AIFF for the highest quality setting, or MP3 if you need to compress the file for storage capacity.
-
Check, name and back-up! Once you have bounced your file, always listen through to double check there are no imperfections. You can drag a bounced file into Logic too to quickly check visually that nothing is off with the volume or sections are missing. And as anyone working with audio files will tell you, ensure that you accurately name projects (use dates!) and back up files to ensure you don’t get confused between versions of projects, or lose them.
Logic pro for performing live
As mentioned before, Logic is often not the most common DAW for live performance, but does include Playback and Live Loops features that would allow you to create live sets if you so desire.
Every electronic musician’s approach to live sets is a little different - you will have to configure a unique setup that works best for you. It would also be wise to integrate hardware or MIDI controllers to your setup, so you can trigger and manipulate loops, play virtual instruments, and control effects in real-time.
Troubleshooting and additional resources
As anyone will tell you, even after years of using Logic, you’re likely to come across new challenges as you take on more projects and push the boundaries of your creativity even further. From software glitches, audio configuration problems, or workflow challenges, you can be sure that someone else has encountered the very same issue before.
YouTube tutorials provide endless guidance on specific problems you will encounter, as well as being useful in their visual guidance. Aside from searching for a straight up logic pro tutorial, a few to check out include MusicTechHelpGuy, You Suck at Producing, and Produce Like A Pro. Finally, online production communities such as the Logic Pro Help/Apple Support Forum, as well as Reddit forums r/Logic_Studio and r/WeAreTheMusicMakers are awash with troubleshooting advice.
Conclusion
So there you have it, a basic overview of one of the world’s most powerful and intuitive music production softwares. From recording and editing audio to mixing, mastering, and even live performance, it offers the full suite of tools professional musicians, producers, engineers and sound designers use to create all your favourite music and audio. So, dive in, unleash your creativity and keep practicing, experimenting, and exploring the endless possibilities Logic has to offer.
