■ Features
From Underground to Iconic: An Interview with Framework’s Kobi Danan
› Read more
Audio mixing is an important part of the music post-production process.
To help you get started, music producer Gemma Whitfield has created a step-by-step guide to mixing music for beginners.
In music production, mixing is the process of blending and balancing individual sounds or tracks together to create a final recording. The process involves adjusting the volume levels of various elements and incorporating creative effects such as EQ, reverb and delay. The goal is to create the right balance and achieve a professional, polished sound.
Audio mixing can be the make or break of a recording. If your tracks are clipping and distorting because they’re not at the right volume level – this could be seriously off-putting or even physically painful to listen to.
If you want to take your music to the next level, here are 10 audio mixing steps that will guide you through the whole process: from selecting your mixing software to your final mix.
A Digital Audio Workstation (DAW) is a software program used for recording, editing and mixing audio. There are a lot of DAWs to choose from and it mainly boils down to a matter of personal preference and compatibility with the operating system you are using.
Apple’s Garageband is a good entry-level option if you’re totally new to production and want to get a feel for it. It’s also free – but you will need a Mac.
If you’re looking to graduate from Garageband, Logic Pro remains a popular choice among beginners and professionals alike. Also built for Mac users, it’s incredibly powerful and includes a massive collection of sounds (70GBs worth), virtual instruments and effects plug-ins to kickstart your creativity.
Logic’s UI works particularly well for bands, producers and singer/songwriter types that write and record their music in a more linear, structured way. You can even use the built-in score editor to view and edit your tracks as music notation.
Another popular option is Ableton Live. Live gives you the option to create your song in the traditional, linear arrangement - or throw constraints out of the window and start looping sounds on-the-fly. The flexible interface, range of creative effects and potential for live performance makes Ableton a favourite among DJ’s and electronic music producers, but it could work just as easily for a singer/songwriter. Unlike Logic and Garageband, Ableton can be used on both Windows and Mac computers and comes in 3 editions: Intro, Standard & Suite.
Some alternative options include FL Studio, Cubase and Pro Tools. As a beginner, it can be easy to get overwhelmed with all the choices – but most DAWs have a free trial, so do your own research, find the DAW that works for you and stick with it.
For this guide, we’ll be working in Logic Pro. But these techniques and principles can be applied to any DAW of your choice.
Our first step is to set up our work environment. We could start from scratch with a blank canvas but it’s a good idea to use a template.
Most DAWs provide templates to get you started. You can also create your own templates – this will help you to save time on creating tracks each time you open your DAW.
This stage is often overlooked, but it’s important to organise your work so you can easily navigate your session and ultimately save yourself a lot of time.
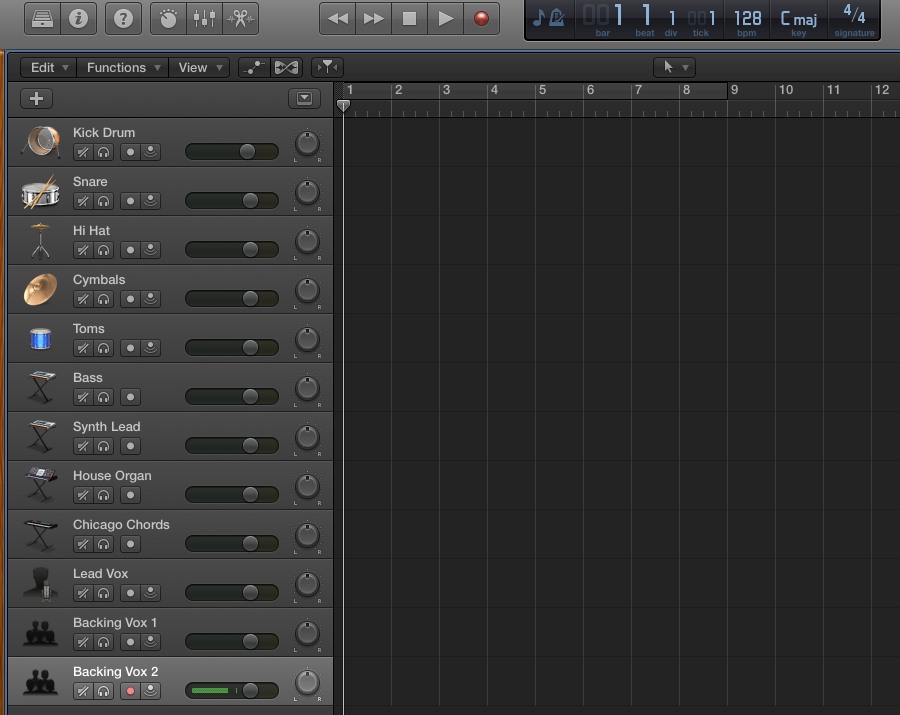
Naming and colour coding your tracks early in the mixing stage is a well-established professional practice that will help you to stay organised.
Here, we’ve named and grouped our tracks appropriately and assigned a colour to each instrument family. This will be useful if we need to focus on one particular part, or go searching for a sound that needs to be fixed.
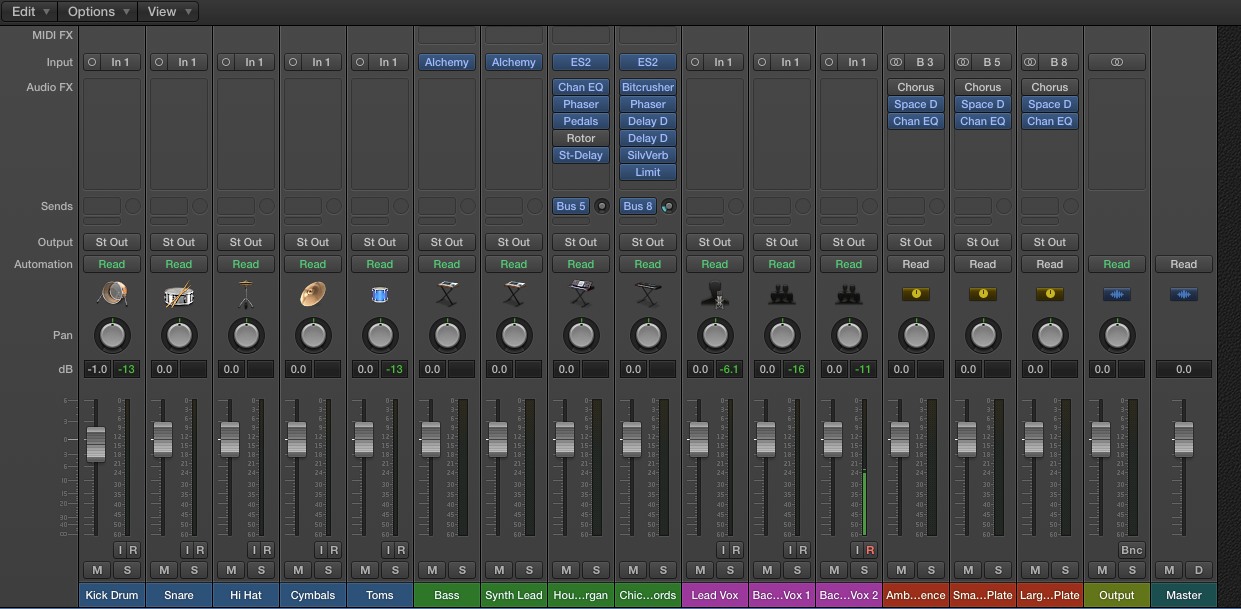
Now we’re ready to start mixing. The first thing we want to do is balance our volume levels - this is also referred to as gain staging.
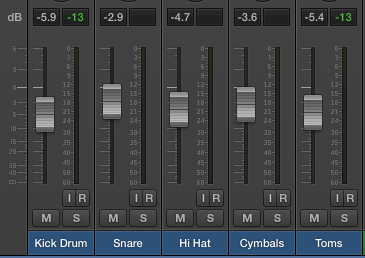
Some producers start with all of the volume faders up and bring each track down individually, fine-tuning the balance to their tastes. The goal is to ensure that each track can be heard and has its own appropriate place in the mix. We also must ensure that no track is so loud that it is distorted or clipping – so keep it well below the red light territory.
It might be helpful to visualise a real band on stage: the drummer is usually placed further behind the other performers while the vocalist is front and centre - you wouldn’t want the drums to drown out the vocals. Let this guide your decisions on how loud or quiet your tracks should sit in the mix.
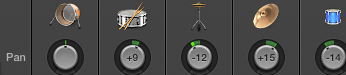
Panning allows you to place sounds in the stereo field. You can pan sounds all the way to the left, the right and everywhere in between.
Let’s think back to our band analogy: the lead singer is usually centre stage, with guitarists to the left/right of the stage. Panning allows you to create space for each of your tracks, giving them room to breathe in the mix. It’s usually a good idea to keep low frequency sounds like the bass and the kick drum in the centre, with higher frequencies spaced around them – but feel free to experiment.
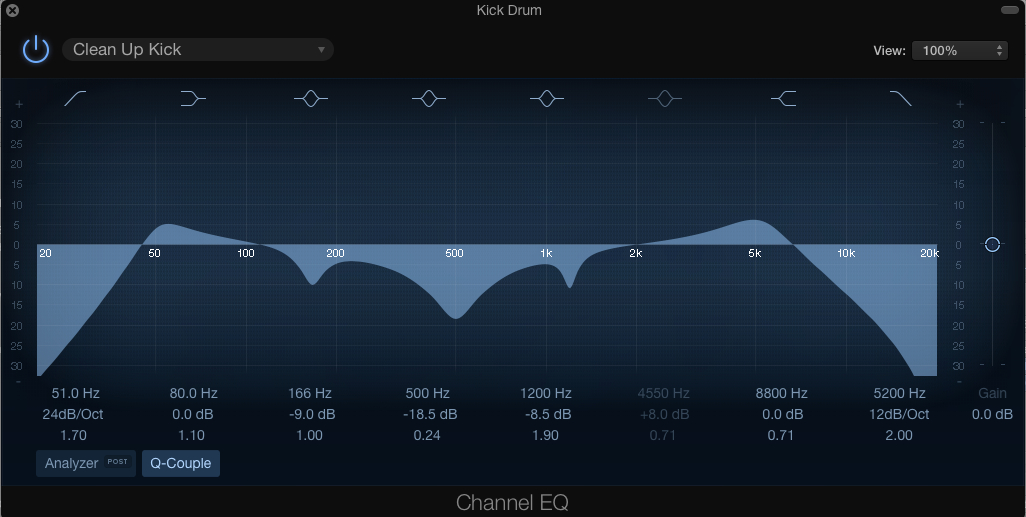
Put simply, equalisation (EQ) is a process that allows you to adjust the volume of individual frequencies in a sound. We can take a subtractive approach to cure problematic sounds or an additive one, emphasising the frequencies we want to hear.
Say, for example, our kick drum lacks clarity and is cluttering the mix (this is often referred to as muddy), we can apply a filter to that track and roll off some of the lower frequencies to clean it up. Alternatively, if we wanted to emphasise the bass in the kick, we could boost the low frequencies of the sound.
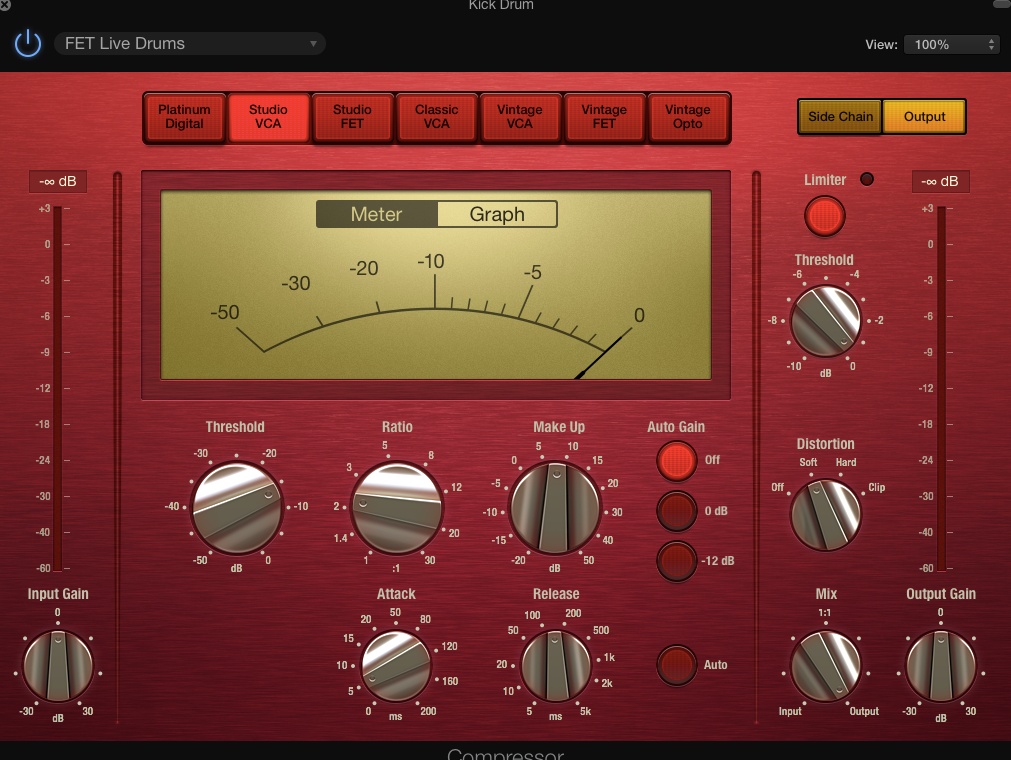
Compression is a process used to reduce dynamic range: squashing down the louder sounds and boosting the quiet parts. This helps to control the maximum volume level and achieve consistency throughout, resulting in a more balanced, professional sound. It’s virtually as though we’re turning the volume faders up and down through the song – but compression allows us to automate the process.
Compression can be applied to the entire recording – or it can be used creatively on individual tracks to achieve a punchier sound (most often on the kick drum in electronic music).
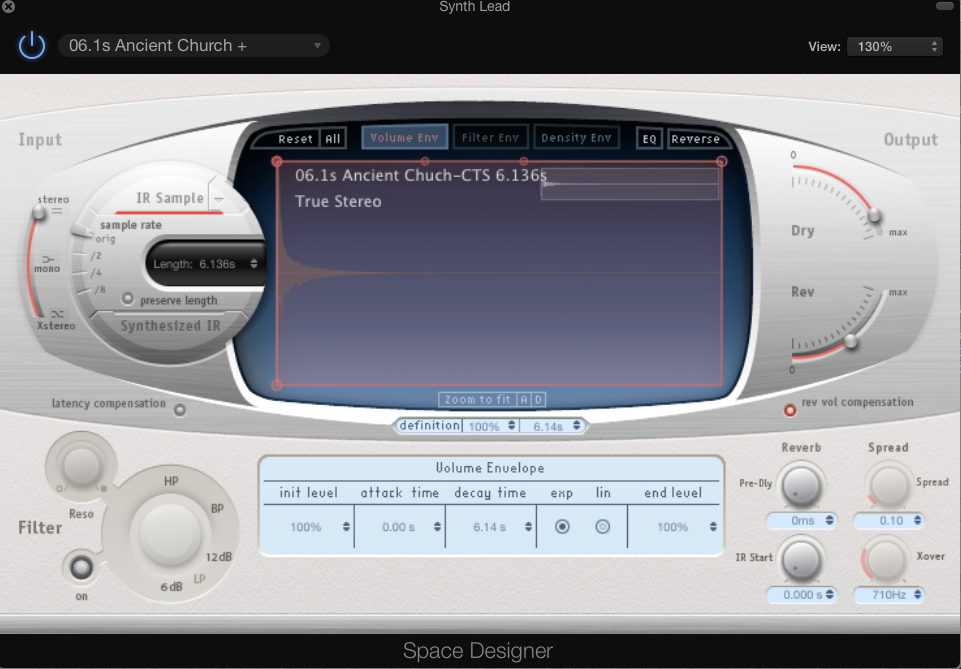
Reverb describes the reflections of sound that occur when a sound is heard in any given space. The space is what’s important here – for instance, a handclap would sound very different inside a wardrobe compared to how it would sound inside a cathedral.
Reverb is one of the most-loved effects in music production and most producers apply it liberally to add a sense of character and natural depth to their tracks.
Using Logic’s Reverb plug-in, we could use the pre-sets to add reverb to our vocal track and artificially recreate the sound of a certain space. If we wanted to, we could make it sound like our singer was inside a church, rather than in a bedroom. Reverb is part of a wider family of time-based effects such as Echo and Delay, which can also be used for creative effect.
A lot of people ask what mixing is vs mastering. Mixing and mastering are completely different processes. It's not until you're happy with your mix that you'll tackle mastering which is the final stage of the music production process.
The goal of mastering is to polish your mix to a professional level and prepare it for distribution. Mastering is quite a complex process and involves both creative and technical tasks including compression, limiting and stereo enhancement.
Ultimately, having your track mastered by a professional will ensure it competes with other recordings in terms of loudness, quality and consistency. AI tools such as those offered by SoundCloud and LANDR can master your music for you – or you can learn how to use professional mastering plugins such as iZotope’s Ozone.
Mixing a creative process just as much as it is a technical one – this beginner’s guide covers some basic concepts to point you in the right direction, but it’s not intended as a rule book. Different producers take different approaches depending on genre and their own personal style. Feel free to experiment – and have fun. As legendary producer Quincy Jones once said:
“You make your mistakes to learn how to get to the good stuff”.
If you don't have space or equipment at home, you can learn to edit, mix and master your music at Pirate's worldwide recording studios, bookable by the hour.