Essential recording studio equipment for 2023

Whether you're an aspiring audio engineer or a musician creating new tracks, here is a list of the recording studio equipment you’ll need in 2023.
Recording technology is constantly evolving, and staying up-to-date with the latest equipment is essential for any recording studio looking to produce high-quality audio in 2023.
With over a decade of experience in writing songs and audio engineering, we’ve teamed up with Max of Max DB Audio to gain insight into what it takes to build a recording studio for all levels. He’s built a professional recording studio above Pirate's south London studios and has extensive experience in recording, mixing, and mastering music for various genres.
Whether you're a professional audio engineer or a budding musician, this guide will help you create the ideal recording studio for your needs.
Building a recording studio
Building a recording studio requires careful planning, research and budgeting. Knowing the basics of what equipment you need and what it will cost will help your studio be functional and cost-effective.
"You won't realise how noisy the world is till you build a recording studio". - Max, Max DB Audio
What to consider when setting up a recording studio
When setting up a recording studio, the main things to consider are:
- Equipment
- Room acoustics
- Power and networking
- A computer
- Audio interface
- Comfort
- Security and accessibility
Different types of recording studios
There are two main types of recording studios, a home recording studio and a professional studio, which is also known as a commercial recording studio. They will each have different acoustics, equipment, and facilities that are best suited for capturing certain types of music and sounds.
Once you've decided whether you'd like to work at home or in a more professional recording studio environment, you can break the two main different types of recording studio down even further:
- Bedroom recording studio
- Home dedicated recording studio
- Semi-professional recording studio
- Professional recording studio
Below we’ll discuss the pros and cons of each type of recording studio for artists at all stages of their careers.
Bedroom recording studio
With an increasing number of musicians and producers creating music almost entirely on just a computer, setting up a studio to do so, has become a simplified process for individuals at all levels and with different budgets.
A bedroom recording studio is a small setup that’s in a spare room or a dedicated space in a bedroom. This is perfect for beginners who are starting out and want to learn the basics of recording and production without investing a lot of money.
Essential equipment to consider for a bedroom recording studio include:
- Computer
- Audio interface
- Microphone
- Headphones
- Recording software
- Monitor speakers or studio monitors
Home dedicated recording studio
Built in a separate, standalone room, a home dedicated recording studio is used by individuals who need a high-quality and professional recording environment, with the flexibility of working from home.
Similar to a bedroom recording studio, the setup for a home dedicated recording studio includes a computer, audio interface, microphone, headphones, recording software and monitor speakers or studio monitors.
However, this next-level home studio solution might also have:
- Acoustic treatment to control and reduce the sound, reflection and waves in a room
- Soundproofing to prevent outside noise from entering a recording session and avoid sounds escaping from the studio. The most popular products to use are soundproofing foam, acoustic sealant and mass loaded vinyl
Semi-Professional recording studio
Unlike a home dedicated recording studio, a semi-pro studio is available for public use. They’re a great setup for individuals who need a high-quality, professional recording environment to produce their work, and who may not want to invest in building their own studio due to circumstances or can't afford a professional studio.
The essential setup for a semi-professional recording studio includes a more advanced audio interface such as the Apollo x8 or the RME Fireface UFX, microphones, studio monitors and pro recording software, like Logic Pro.
A semi-professional recording studio might also feature:
- A control room to mix and edit the audio
- A recording booth or live room to minimise reflections and outside noise
- A digital mixer to mix and the process audio in the control room
- A MIDI controller to control the software and hardware in the studio
Professional recording studio
Professional recording studios are popularly used by people with a high level of expertise and experience in audio production like studio engineers, producers and musicians. For example, audio engineers and musicians use professional studios to produce professional-grade audio content for record labels, films and TV production companies, and other commercial clients.
Equipped with state-of-the-art technology, such as high-end audio interfaces, microphones, the best midi keyboards, mixers and much more, professional studios are suited for those who have the budget to invest in professional-quality equipment and services.
Recording studio equipment
Getting a studio setup correctly can be a hassle-free endeavour with the support of Pirate and Max.
Below, we’ve listed the most important equipment you’ll need to produce high value sounds with recommendations of resources you should consider:
- Computer
- Digital Audio Workstation (DAW)
- Audio interface
- MIDI controller
- Microphone
- Headphones
- Audio monitors and speakers
- Acoustic treatment
- Microphone accessories, stands and stockmounts
- Pop filters
- Cables
- Plugins and virtual instruments
- Guitar pedals
- Studio chairs
- Desk or workstations
- How to make the most of your budget
Computer
As the majority of studios are digital, a computer is a main investment you’ll need for a recording studio. You’ll need it for recording, editing, mixing audio, and running software instruments and effects.
The set-up for a beginner user would be a basic computer made up of a decent amount of RAM and storage, running a basic digital audio workstation (DAW) software, like an Apple Mac or the HP Pavilion Gaming Desktop. Which is recommended by Max and cheaply available on eBay.
A professional set-up, on the other hand, would need a high-performance computer with more RAM and storage, running a more advanced DAW that has more experimental features to create high quality sounds. With Max’s recommendations, consider using an Apple Mac Pro due to the ease of use, large memory available and its super fast processor.
When setting up your computer make sure to consider the following for a smooth recording session:
- The processor speed and type (e.g. Intel Core i7 or i9)
- The amount of RAM
- The storage capacity and type (e.g. solid-state drive (SSD) vs. hard disk drive/HDD)
- The type and number of inputs/outputs (e.g. USB, FireWire, Thunderbolt)
- The compatibility the computer has with the DAW software you plan to use
- Additional hardware like audio interfaces, studio monitors, and MIDI controllers
Digital Audio Workstation (DAW)
A DAW is the software on your computer that creates and produces music, sound effects, and other audio content.
Max highlights that mixing sounds on his DAW is his personal favourite part of sound engineering. This comes from his satisfying task of sitting down and making the raw audio sound like a finished record. He calls mixing sound one of the best and most difficult parts of being an audio engineer.
He also advises the importance of achieving a great mix:
"Go to a good mixing engineer to get your track sounding good across all platforms, whether that’s your car, your phone or laptop speakers, or headphones."
There are various DAWs available for all levels, choose one that is within your budget and suited for your sound. A beginner user would only need to use a basic DAW software such as Audacity or GarageBand, which are free and relatively simple to use. Whereas, a professional set-up would need to include a more advanced DAW which have more advanced features and VST plugins such as:
- Pro Tools
- Ableton Live
- Logic Pro
As recommended, Max’s preferred DAW is Pro Tools and he uses a myriad of different plugins for different genres:
"I’ve got certain plugins which live on my template, others I only use for certain genres. My template is always evolving, always changing."
When choosing a DAW for a recording studio setup, these are some things to consider:
- Compatibility with your computer's operating system and hardware
- The number of tracks and inputs/outputs you need to record and mix
- The types of effects and virtual instruments you need to use
- The ease of use and interface design
- The cost and any additional costs for plugins or expansions
- The level of support and tutorials available for the software
Audio interface
An audio interface connects a microphone, instrument, or other audio source to a computer, allowing it to be recorded and processed by a DAW. It’s used to capture high-quality audio recordings and to route audio signals to and from the computer.
A home studio would use a basic audio interface with a small number of inputs and outputs, such as a USB interface like the Focusrite Scarlett Solo or the PreSonus AudioBox USB 96. However, for a professional studio, Max prefers to use a Universal Audio Interface with UAD’s Unison Technology, a professional virtual console which gives him access to up to twenty-four channels of console emulation. Explaining the benefits of this virtual console, he mentions:
"You can pick and choose from 4 consoles on the way in, depending on what sound you’re after, printing your preamp, eq and compression just like a traditional desk.
Most other studios will usually have one dedicated console/desk. With me, you’ve got an option of whatever flavour you want."
Universal Audio’s Unison Technology has been coined an 'audio engineering breakthrough'. This comes as no surprise when you consider the depth of choice in sound.
When setting up an audio interface for a recording studio, it's important to consider the following factors:
- Compatibility with your computer's operating system and hardware
- The number of inputs/outputs you need to record and mix
- The quality and type of preamps and converters
- The latency and sample rate of the device
- The cost and any additional costs for plugins or expansions
- The level of support and tutorials available for the device
Discover all you need to know about audio interfaces on our blog.
Midi controller
A MIDI controller allows a user to control and manipulate various parameters of a MIDI-compatible software or device. Think of it as a physical instrument that controls the virtual sound.
There are excellent MIDI controllers available, with producers working with pad controllers, keys or both. We suggest using a MIDI keyboard with sample pads. This will allow you to play and record sounds into your computer while having more experimental control with the DAW software instruments and VST plugins installed on your computer.
Beginners starting out should use a MIDI controller with a limited number of knobs and buttons, and not challenging to use such as the Akai MPK Mini or the Novation Launchkey Mini. These controllers are functional, inexpensive and easy to use, making them a great choice for someone just starting out in a home studio.
A professional should consider a more advanced MIDI controller with a larger number of knobs and buttons, such as the Native Instruments Komplete Kontrol S88. These controllers offer more advanced features and greater control over the software or device, making them a better choice for someone working in a professional studio.
When choosing a MIDI controller for your studio make sure to consider the following:
- Consider the type of software or device you will be using it with
- Compatibility with your setup
- Consider the number of knobs and buttons you will need, and the type of control you will require over your software or device
Microphone
When it comes to choosing recording studio microphones for a music practice room, there are thousands of options.
On the importance of finding the right set, Max explains:
"If you're starting out and wondering where to spend your money, don't spend it on the interface, or the monitors, or plugins first. Start where you first capture the audio, the microphone…
If you get good microphones and apply correct mic placement, you'll get good audio. Then you can do good stuff with that audio."
However, there’s not much hassle when micing up a guitar amp or vocals, but there comes a real art to recording drums because they’re not actually a single instrument. Drums are made of loud percussion instruments. It’s quite popular to see when recording drum kits multiple microphones being used to capture all and the best sounds.
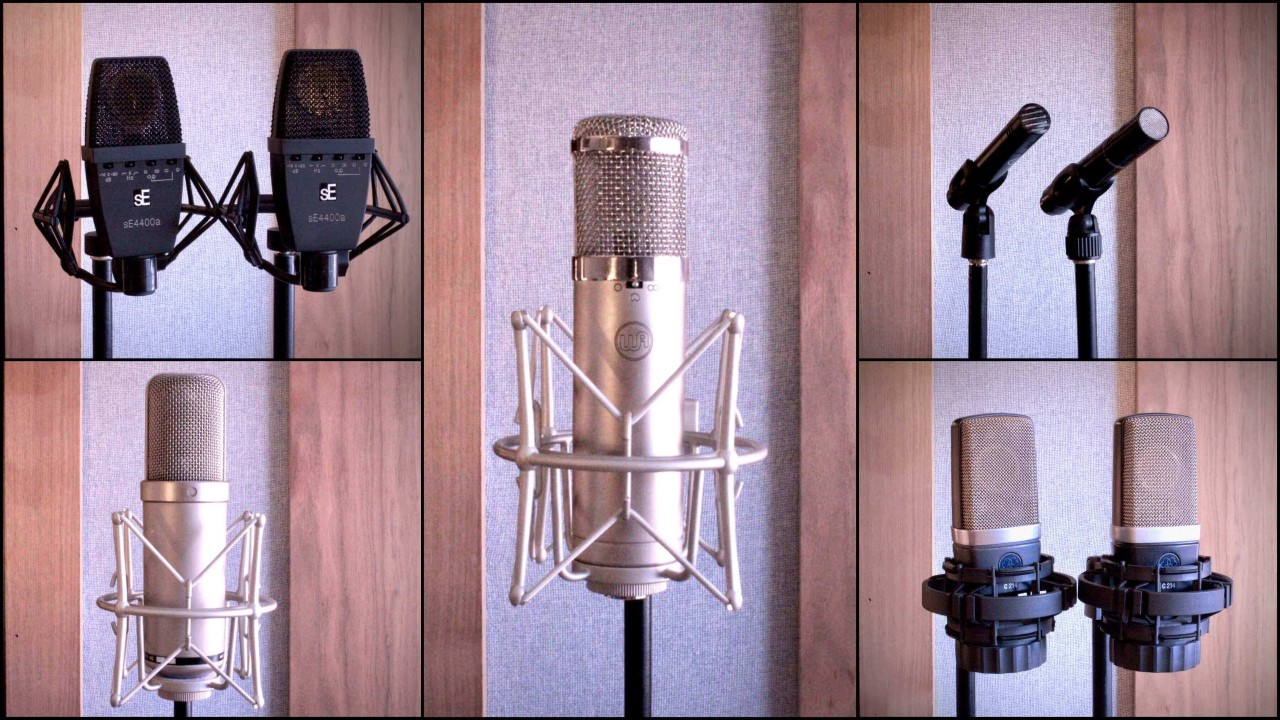
With this in mind, Max gives a run-down of some of his favourite studio recording microphones, all of which he employs in his West London studio sessions:
- Sennheiser E602 (for beat-bass drum): "I used to use an AKG D112 on the kick drum (inside) all the time. More recently, I've switched it up and I use the Sennheiser E602. It has more attack and slightly more scooped low mids. It ends up naturally sounding closer to how I’d EQ it."
- Warm Audio WA47JR (for drum and vocals): "I use this for kick out - it’s Warm Audio’s emulation of a Neumann U47 FET which is a classic mic to use for kick out. It offers a tight low-end frequency response and it also sounds great on vocals."
- Beyerdynamic M201TG (for drums): "I tape this on to a Shure SM57 for snare, they’re similar sounding mics but I feel the M201TG offers better hi-hat rejection. I use both so I have options when mixing."
- Sennheiser e609 (for drums): "This is a slightly controversial one as it’s not an amazing mic by any standards, quite harsh and bright. However, I use it for snare bottoms as I only ever really want a bit of bite/snap from the snare which will be heavily compressed and gated. This mic’s profile also means it’s easy to get into position."
- Sennheiser MD421 (for drums): "I use a pair of these on toms. They just sound great on toms and always have very little EQ needed, decent snare and cymbal rejected if placed correctly. I also use the AKG D112 on the floor tom."
- Sennheiser E614 (for drums): "I don’t always mic up HiHat and Ride but If I do, I turn to a pair of these guys - mainly if the song has an intricate ride pattern which needs extra definition and likewise an intricate HiHat sound which isn’t cutting through the mix."
- RM Biv-1 with Shure SM57 (for guitar cab microphones & set-up): "My recent set-up is a RM Biv-1 Ribbon microphone flat against the cone, with a Shure SM57 off axis alongside it. This is a fairly old technique, you get the weight and roundness from the ribbon and the articulation and mids from the SM57. Combined, you get a classic fat guitar sound, especially when double tracking guitars and hard panning."
- Warm Audio WA47JR with Sennheiser MD421 or AKG D112 (for bass cab microphones & set-up): "I often end up sending the DI signal from a bass to one of the great amp simulation plugins I have. I also have a Sansamp RB1 rack unit which sounds great when blended in with the DI signal and adds a bit more string definition, saturation and overall clarity to the bass. If I’m mic-ing up a bass cab I’ll usually mix it up and experiment with different combinations of large diaphragm condensers and dynamic mics. This setup changes a fair bit but my WA47JR along with a Sennheiser MD421 or AKG D112 often does the job."
- SE Electronics SE Z5600a II (for vocals): "I recently purchased an SE Electronics SE Z5600a II tube microphone which sounds great on almost everyone. Other great alternatives for vocals are my WA47Jr, SE4400a or Rode NTK."
Remember Max’s advice that if you capture rubbish audio using a rubbish microphone, it doesn't matter how many plugins, what amazing speakers you've got, how great your sound treatment is in your room, you’re making harder work for yourself. Keep in mind not to get into the habit of fixing everything in post.
Headphones
When investing in a pair of studio headphones, read reviews and find the best ones for purpose: recording headphones, production headphones or DJ headphones for mixing. In a recording studio, they provide a way to listen to audio in a private and isolated environment, which is essential for accurate and precise adjustments.
For a beginner setting up a recording studio, use a basic over-ear headphone such as the Sony MDR-7506 or the Audio-Technica ATH-M20x. These headphones are affordable, provide good sound quality and are comfortable for long periods of use.
There are two main types of pro audio headphones; closed back and open back headphones. Open back headphones allow air to pass through the ear cups giving a natural and clear sound. Whereas closed back headphones block out outside noise and provide better sound isolation due to them being sealed at the back of the ear cup.
Max’s recommended headphones are the Sennheiser HD-600s, which he describes as excellent all-rounders:
'My favourite headphones are the Sennheiser HD-600s. Those are the ones to get in my opinion. They’ve got a fairly flat EQ response and being open-back you can wear them comfortably for many hours and feel confident your mixes will translate well.'
When choosing headphones to use in music production studios, consider the following:
Sound quality: This provides accurate and neutral sound reproduction, so you can make accurate adjustments to your audio Comfort: It's important to choose headphones that are comfortable for extended use Isolation: Closed-back headphones offer good isolation and minimise external noise, which is useful in a noisy recording environment Connectivity: Headphones should be connected to the audio interface or audio interface built in the computer
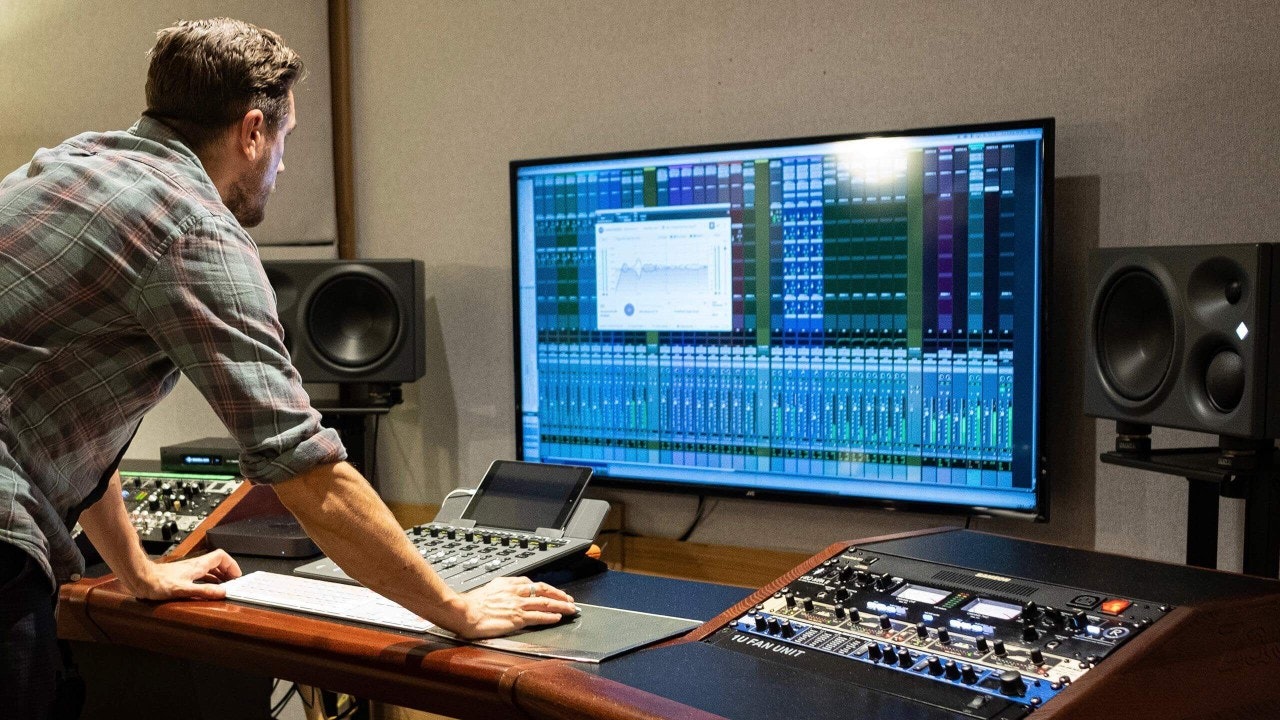
Audio monitors and speakers
Audio monitors (also known as studio monitors) are used in professional studios and speakers are used mainly in home studios. They both provide a flat, accurate and neutral sound reproduction, so that audio engineers can make accurate adjustments to their audio.
A common question people ask is how many speakers do you need? Well, this depends on the use of your studio. Quality monitors are key to a great studio set-up but you're not going to get a great sound out of those monitors unless you have good speaker stands. The right speaker stands will isolate your hi-fi, leading to a tighter bass response and better soundstage.
Max recommends using three-way active speakers as they have a higher level of accuracy, clarity, and versatility. He upgraded his studio monitors last year, from a pair of ADAM Audio A7Xs to a pair of three-way active speakers - Neumann KH 310s.
When setting up audio monitors and speakers for a recording studio consider the following:
- Sound quality: Have monitors that provide accurate and neutral sound reproduction, so you can make accurate adjustments to your audio.
- Room acoustics: The room where the monitors will be placed should reduce reflections and standing waves, this will help to provide a more accurate sound
- Placement: Studio monitors should be placed at an equal distance from the listener and angled towards the listener's ears for optimal sound reproduction
- Volume: Monitors should be set at a moderate volume, not too loud or too quiet, to avoid any fatigue or hearing damage
- Power: Make sure that the monitors have enough power to drive them properly, and that they are plugged into a power source that is free from any interference
Acoustic treatment
Acoustic treatment controls the sound within the room and improves the overall sound quality of audio recordings. It reduces unwanted reflections, echo, and standing waves.
No matter what the type of studio being set up is, it’s highly recommended to purchase some acoustic panels and isolation pads. This will have a major impact on the sound that will be recorded in comparison to not having them installed.
You need to consider the following when treating you studio:
- Room size and shape: the size and shape of the room can have a big impact on the sound quality, so it's important to choose the right types of treatment for your room
- Placement: Acoustic treatment should be placed in the right areas of the room to achieve the best results. For example, bass traps should be placed in corners, while diffusers should be placed on walls
- Sound quality: The acoustic treatment should be chosen to improve the overall sound quality of the room and make it more suitable for recording
- Aesthetics: Some acoustic treatment options might not look very pleasing, choose the option that will fit the overall aesthetic of the studio
Here are some popular acoustic treatment options available:
- Auralex Acoustics Studiofoam: A line of foam panels that are easy to install and can be used to improve sound quality in a small room.
- GIK Acoustics: A line of bass traps, diffusers, and absorbers that are suitable for larger rooms and more complex recording setups.
- Primacoustic: A line of bass traps, diffusers and absorbers that offer a wide range of products for different room sizes and shapes.
Microphone accessories, stands and stockmounts
Microphone accessories, stands, and shock mounts hold and position the microphone in the right place, to reduce handling noise and to isolate the microphone from unwanted vibrations.
When recording in a studio, shock mounts are used for more sensitive mics. To capture the best sound quality possible, the best solution is to:
"Get the dedicated shockmount from the original manufacturer of your particular mic model".
It's also essential to invest in some decent studio microphone stands. You must be able to trust your mic stands to hold microphones in place.
For every studio microphone you buy, you need to consider the correct mic stand to keep it safe and secure:
- For your kick drums and guitar cabs, you need a low-profile stand.
- Aesthetically similar to these, you have desktop mic stands which are intended for podcasting and bedroom studio recording.
- Overhead stands are the largest and most expensive of all - you'll need these when dealing with height, such as for drum overheads.
Popular microphone accessories you might also want to invest in include:
- Boom arms: A boom arm is an adjustable support that allows for easy movement of the microphone
- Windscreens: A windscreen is a foam cover that fits over the microphone to reduce wind noise and plosives during vocal recording.
- Shock mounts: A shock mount is a device that attaches to the microphone and isolates it from vibrations and noise
Before shopping for microphone accessories, stands and shockmounts, make sure you consider:
- Type of microphone: Different microphones have different mounting requirements, so it's important to choose the right accessories for your microphone
- Type of recording: The accessories and stands that are suitable for a podcast recording, for example, may not be suitable for an orchestral recording
- Placement: The microphone accessories should be placed in the right areas of the room to achieve the best results. For example, a boom arm should be placed in a position that allows for easy movement of the microphone
Pop filter
Pop filters, also known as pop shields or windscreens, reduce or eliminate the popping sound (also known as "plosives") that can occur when certain sounds like "p" and "b" are pronounced too close to the microphone. These sounds are difficult to hear for the artist while recording but can be picked up easily in the microphone.
A beginners studio would involve a basic pop filter that attaches to the microphone stand, like the Auphonix pop filter. These are double-layered pop filters that attach to any standard microphone stand. While a professional setup would include a more advanced pop filter that can be adjusted and positioned for optimal sound quality like the Neewer Professional Studio Broadcasting and Recording Microphone Pop Filter. This filter is made of durable and high-density nylon material that can effectively reduce noise and improve sound quality.
Cables
Cables come in different types and sizes, such as XLR cables, TRS cables, and USB cables, to name a few.
Max encourages users to spend more on good quality leads and buy them once because it works out cheaper in the long run. Buying studio cables that will last is better for your wallet and the environment. However, if you can’t afford the up-front cost, there are lots of cheap cable solutions out there on Ebay and Amazon.
Plugins and virtual instruments
Plugins and virtual instruments are software programs that are used to enhance and manipulate audio recordings. They’re used for a wide range of tasks like adding effects like reverb and delay, EQ, compression, and more. Virtual instruments are also used to create and play back digital instruments like drums, pianos, and synthesisers.
A beginner setup would typically involve a few basic plugins and virtual instruments like a compressor, an equaliser, and a few basic virtual instruments like a piano or a drum machine. A professional setup, on the other hand, would include a wider range of plugins like wave plugins that are widely used. Pro and home studios can use virtual instruments like Native Instruments Kontakt that includes a wide range of instruments, from pianos and drums to orchestral instruments and more.
With this, Max uses the following five main plugin manufacturers across rock, pop and urban music genres:
Guitar pedals
Guitar pedals, also known as effects pedals, modify the sound of an electric guitar or bass in a recording studio. They add distortion, delay, reverb, and other effects to the guitar signal.
A simple set-up for a home studio would consist of a few basic pedals such as a distortion pedal, a delay pedal, and a reverb pedal. These can be connected in series using instrument cables, with the guitar plugged into the input of the first pedal and the output of the last pedal connected to the input of the amplifier or audio interface.
A professional set-up, on the other hand, includes a larger number of pedals, possibly including specialised pedals such as a wah pedal, a modulation pedal, and a loop pedal. These pedals would be connected in a similar way as the beginner set-up, but with more options to create complex effects chains.
Max confesses his unhealthy amount of guitar pedals and shares his history of playing guitar in bands since he was 13 years old. He currently has over 10 guitars stacked against his studio wall including his favourite: a custom-built Fender telemaster.
Max’s top five guitar pedals for recording bands are:
- Strymon Timeline Delay Pedal: "That thing's amazing. I can't say enough good things about it. It’s great for delays and modulation. You could sit down with that pedal and just flick on one of its 100 presets and play a few chords and you've got a song. It just writes songs for you. You don't have to do anything."
- Line 6 DL4: "I use the Line 6 DL4 pedal as a loop pedal for live stuff. But it's also got loads of amazing delays in it. Even though it’s a bit dated and only 16 bit, it's still a really good sounding delay pedal."
- 1976 Boss CE-1: "That’s a chorus pedal that I've had for fifteen years. It's played on almost every record and every gig I've ever done in my life. I use it a lot when I've got bands coming into the studio. It’s got a certain chorus and vibrato sound that many modern pedals try to recreate, but I’ve been through a few and nothing ever compares to the original."
- Durham Electronics Sex Drive: "That's a tone/gain pedal. That thing just stays on the whole time. It never turns off. I don’t touch the settings, everything at 12 o’clock and leave as is."
- Electro-Harmonix POG: "I've got the first generation one, it sounds amazing with reverbs and delays, it’s awesome."
Studio chairs
Speaking from experience, Max mentions:
"It’s essential that you have a good studio chair to sit on."
It's important to consider factors such as ergonomics and adjustability to ensure that you’re using a chair that can work comfortably for long periods of time.
A home studio would have a more basic chair with minimal adjustments, while a professional studio would have more advanced features such as adjustable height, lumbar support, and swivel capabilities.
Desk or workstation
The desk/workstation should be positioned in a way that allows for easy access to all of the equipment and controls, and the room should be acoustically treated to minimise unwanted reflections and echoes. Think about the size and layout of the room, as well as the specific needs of the user.
How to make the most of your budget
Making the most of your budget for a recording studio involves finding ways to stretch your money as far as possible while still getting the equipment and space you need to create high-quality recordings.
Always prioritise your needs and keep within your budget. Decide what is essential for your recording requirements and purchase those items before any others.
Whether you're on the lookout for home studio equipment or professional recording studio equipment, here are some great places to check out for second-hand and new studio accessories:
- eBay: For second-hand music making equipment from computers to guitar pedals
- Studio Spares: For a mix of professional and more accessible gear from studio monitor cables to microphone pop filters.Studio Spares - For a mix of professional and more accessible gear from studio monitor cables to microphone pop filters
- SX Pro: An international, professional audio recording equipment outlet
Invest in quality over quantity. It's better to have a few high-quality pieces of equipment than a lot of low-quality gear. This will guarantee your recordings to sound professional and polished. Just remember, quality over quantity.
